
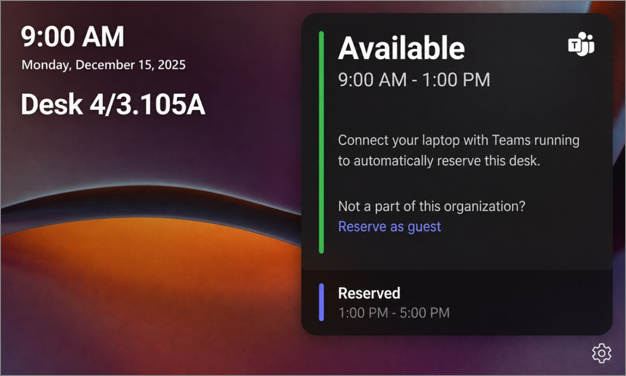
Teams desk hub helps you quickly see if a desk is available and reserve it when you arrive at the office. The Teams desk hub is a touch screen device installed at a bookable desk that displays availability, upcoming reservations, and options for managing your reservation directly from the touch screen.
In this article:
Note
Your organization must configure the desk and associated device before it can be used.
Plug in to Teams desk hub for on-the-spot reservations
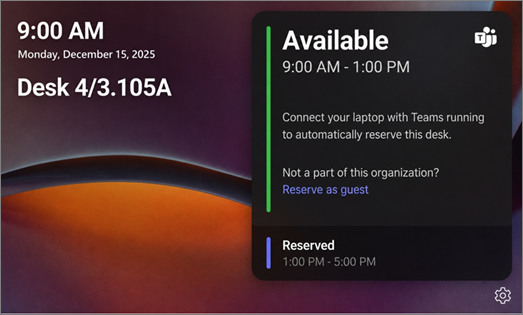
Teams desk hub shows the current date, time, desk name, availability status, and any upcoming reservations.
- Check bookable desk availability
- View upcoming reservations
- Reserve a desk
- Check the desk schedule
- Manage an existing reservation
- Extend or end a reservation
Check if a desk is available
When a desk is available, the desk hub's LED shines green to indicate the desk can be reserved. View the desk hub calendar to check desk availability for that day.
If a bookable desk doesn't have a Teams desk hub, see how to Use bookable desks with Microsoft Teams.
Reserve a desk with a Teams desk hub
To reserve an available desk:
- Make sure Microsoft Teams is open on your laptop.
- Connect your laptop to the desk hub cable. Teams desk hub will tell you if the desk is reserved, or if it’s unavailable.
- After reservation is made, desk hub will be updated to show your reservation. This can take up to 2 minutes after the Teams app notification is shown.
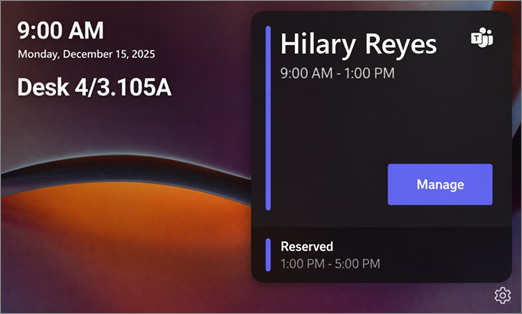
- You can use the “Manage” button on the desk hub touch screen to extend or cancel your reservation.
Reserve a desk as a guest
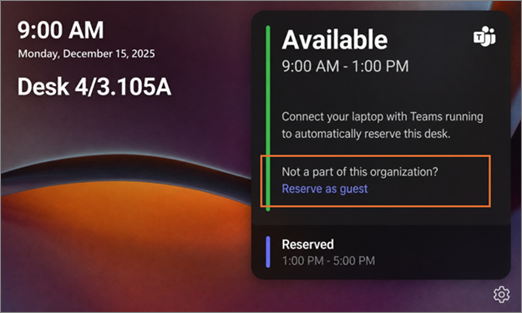
If you're visiting from another organization and don't belong to the organization associated with the desk, you can reserve the desk as a guest. To reserve as a guest:
- Connect your laptop to the desk hub cable if you want to use the desk’s peripherals (monitor, mouse, keyboard, etc.).
- On the Teams desk hub, select Reserve as guest.
- Review the confirmation message: "Only use this when you are not in this organization's tenant."
- Select OK.
Note
When a guest reservation is confirmed, the Teams desk hub will display Reserved instead of a person's name.
Limits on guest reservations
Depending on when reservations are made, guests are limited for certain hours.
Between 8:00 AM and 5:00 PM:
- If you sign in as a guest, your reservation will automatically book until 5:00 PM, unless there is another reservation later that day.
- If another reservation begins later that day, your reservation will end 15 minutes before the next one.
Outside the hours of 8:00 AM and 5:00 PM:
- The reservation lasts for two hours.
View upcoming reservations
Reservations created through Microsoft Places appear on the desk hub calendar. If you have a reservation for the desk, a Manage button appears during the reservation window.
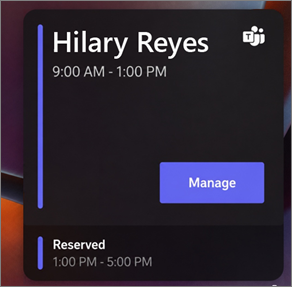
Manage a reservation on a Teams desk hub
- Select Manage to view reservation management options.
- Depending on your reservation, you can Check out or Extend the reservation.
Check out of a Teams desk hub
When you're finished using the desk before your reservation ends, check out so another person can make a reservation.
- On the Teams desk hub, select Manage.
- Select Check out.
The reservation is removed and the desk becomes available for others to reserve.
Extend a reservation
If additional time is available, you can extend your reservation. Available extension options are displayed in two-hour increments.
- Select Manage.
- Select Extend reservation.
- Select a new end time.
Note
If less than 2 hours are available before the next reservation begins, the desk hub automatically extends the reservation to 15 minutes before the next reservation starts.
Check in to your reservation
To check in, connect your laptop to the Teams desk hub cable while Microsoft Teams is running. Microsoft Teams will show a notification telling you that the desk is checked-in and ready for you. After check-in the Teams desk hub screen will display your name and reservation time.
You can also check in using the check-in email sent at the start of your reservation.
Important
Currently, a check-in button isn't displayed on the Teams desk hub, even when a reservation requires check-in.
Desk status limitations with Microsoft Places
If a desk is configured as assigned or unavailable in Microsoft Places, it can't be reserved through the Teams desk hub. These statuses aren't currently shown on the desk hub. If you connect your laptop, Teams notifies you that the desk is unavailable or assigned to another user.
Open Teams desk hub settings to view device information
Tap the Teams desk hub Settings
 menu to display:
- Report an issue
- About
- Device information
- Accessibility settings
- Reboot device
- Privacy policy
Learn more
Use bookable desks with Microsoft Teams Use meeting room mode in Microsoft Teams