First things to know about bookable desks in Microsoft Teams
Need to grab a desk quickly? If you’re working a hybrid schedule and need a place to land in your office for the day, you can reserve a bookable desk. With Teams desktop client, you can make a bookable desk your personal workstation by reserving it in advance or simply by plugging in when you arrive. Even if you haven’t booked a desk ahead of time, the desk will be reserved for you for the rest of the day upon connecting.
Notes:
-
Bookable desks are currently available on Teams Desktop for Windows and Mac.
-
Bookable desks must be set up in advance by your IT admin. If you’re not sure whether your organization has set up bookable desks, check with your admin.
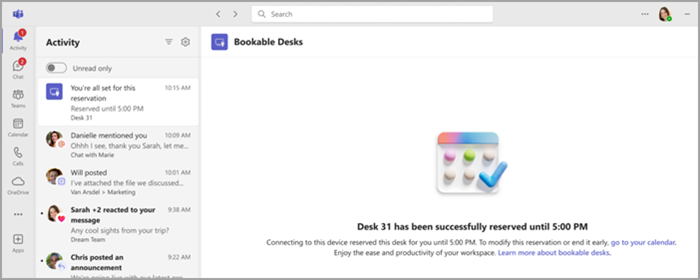
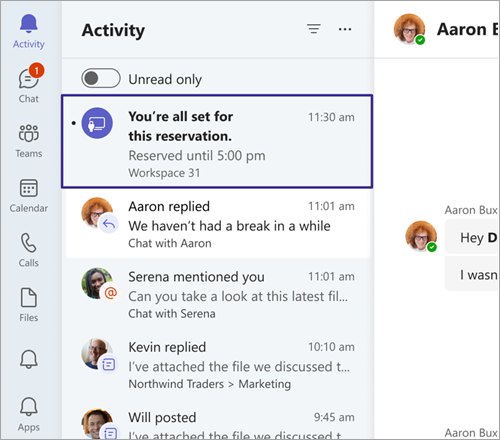
When you connect to a bookable desk, a meeting automatically appears on your calendar, reserving the desk for the rest of that day. You’ll also see a notification in your Activity feed.
Notes:
-
If you plug in to a bookable desk between 8AM and 5PM, the reservation is auto-created from the time you plug in until 5PM on the same day.
-
If you plug in outside 8AM to 5PM, the reservation will be auto-created for two hours, starting from the time you plugged in.
-
You can edit or cancel your reservation through the calendar invite in Teams or Outlook.
-
Hide the desk reservation on your Outlook and Teams calendar by using the filter in the top right corner of your calendar. Select the filter, then choose Reservation > Desk reservations.
Note: Individual desk booking is available as part of Teams Premium, an add-on license that provides additional features to make Teams events more personalized, intelligent, and secure. To get access to Teams Premium, contact your IT admin.
Bookable desks are set up in advance by your IT admin. A designated area of one or more desks is called a workspace or desk pool, which is like a neighborhood in your office. A specific seat in your office (like the desk by the window) is an individual desk.
If you reserve a seat in the desk pool or an individual desk in advance, you’re all set. Instead of reserving the seat when you connect to a bookable desk, you’ll see a confirmation message, letting you know that you are in the right spot and ready to start the day.
You can reserve a desk ahead of time using Teams, Outlook, or Places.
Using Teams:
-
Go to your calendar on the left side of Teams and select New meeting.
-
Set the day and time you’d like to reserve a desk.
-
In the Add location field, type the name of the desk pool or individual desk you’d like to book. You may need to switch off the Online meeting toggle.
-
Select Save.
Using Outlook:
-
From your calendar, select New Meeting.
-
Set the day and time you’d like to reserve a desk.
-
If you know the name of the desk pool you’d like to book, type it in the location field. You can also use Room Finder, or Places finder if available to browse desk pools.
-
Select Send to add the reservation to your calendar. If available, you can reserve a desk pool or individual desk by selecting Desk underneath the New event dropdown menu.
Tip: To cancel a reservation, delete the meeting from your Teams or Outlook calendar.
Using Places:
-
Navigate to the Places app.
-
Select Help me find a desk.
-
You can narrow down your search by applying a building or floor filter.
If you reserved a desk or seat in a desk pool and auto-release is enabled by your admin, there are several ways you can check in. If you do not check in within the allotted time period, the seat is released automatically, making it available for others to book. You will receive an email that the desk has been released.
There are three ways to check in:
Plug into a bookable desk:
Upon connection to a desk peripheral, you will receive an activity feed notification that you have been checked in.
Check in to the building:
You can check in to the desk reservation building by using the check in button in the Places app, setting your work location in Teams, or automatically by connecting to a bookable desk.
Check in through email:
If you have not checked in through either of the above methods fifteen minutes ahead of the desk being released, you will receive an email that the desk is about to be released with a button to complete the check in.
Notes:
-
If you are reserved automatically upon plug in, you will also be automatically checked in.
-
Check in must be set up in advance by your IT admin. If you’re not sure whether your organization has set up check in, contact your admin.
-
Check in is available as part of Teams Premium, an add-on license that provides additional features to make Teams events more personalized, intelligent, and secure. To get access to Teams Premium, contact your IT admin.
If you booked a desk through Outlook, Teams, Places, or automatically by plugging into a desk peripheral, and plug into a different available desk than the one you booked, you will receive a notification.
This notification will alert you that this new desk has been reserved. It will also inform you that you have multiple reservations and prompt you to cancel your previous one to free up unused desks.
If you do not take any action (perhaps you are planning to use both) your reservations will remain as-is.
Note: This feature is available as part of Teams Premium, an add-on license that provides additional features to make Teams events more personalized, intelligent, and secure. To get access to Teams Premium, contact your IT admin.
When you plug into a bookable desk, you have the option to automatically update your work location to In the office or a specific building, depending on how your admin has configured options for your org. The detected location lasts until the end of your working hours. If you plug in after work hours, the location will be set until 11:59 PM that day.
A banner appears at the top of Teams when you first plug into a bookable desk. Select Set my location automatically to turn this setting on.
To turn this setting on or off:
-
Go to Settings and more
-
Scroll to the bottom of the page to find Manage my work location. This setting is turned off by default.
-
Use the toggle to turn on or off Automatically set my work location to office across all devices when connecting to my organization's networks and devices.
You can still change your work location after plugging into a bookable desk. Simply select your profile picture, select your work location under your current status, and choose from the available options.
Notes:
-
If you have opted to not share your work location, you can still opt-in to automatic location detection. Your detected location is only visible to you in your profile card. It is not shared with others.
-
If you don't see the banner notification or aren't able to turn on this option, check with your IT department.
Related topics
Use the scheduling assistant and room finder for meetings in Outlook


