
Use Goals view in Microsoft Planner to connect your tasks to the outcomes you want to achieve. Create goals for your plan, connect the tasks that contribute to each goal, and update goal details as your work progresses.
Note
This article applies to basic plans in Planner on the web and Planner in Microsoft Teams. Plan members with the appropriate license can create, edit, and delete goals.
Open Goals view
Open your basic plan in Planner, and then select Goals.
Create a goal
- In Goals view, select Add a goal.
- Enter a name that describes the outcome you want to achieve, such as "Prepare for the product launch."
- Choose a color to help distinguish the goal.
- Set the goal’s Status and End date, as needed.
Connect tasks to a goal
Connect existing tasks or create new tasks to show which work contributes to a goal.
Connect existing tasks
- In Goals view, find the goal you want to connect tasks to.
- Select Connect tasks.
- Find and select the tasks you want to connect.
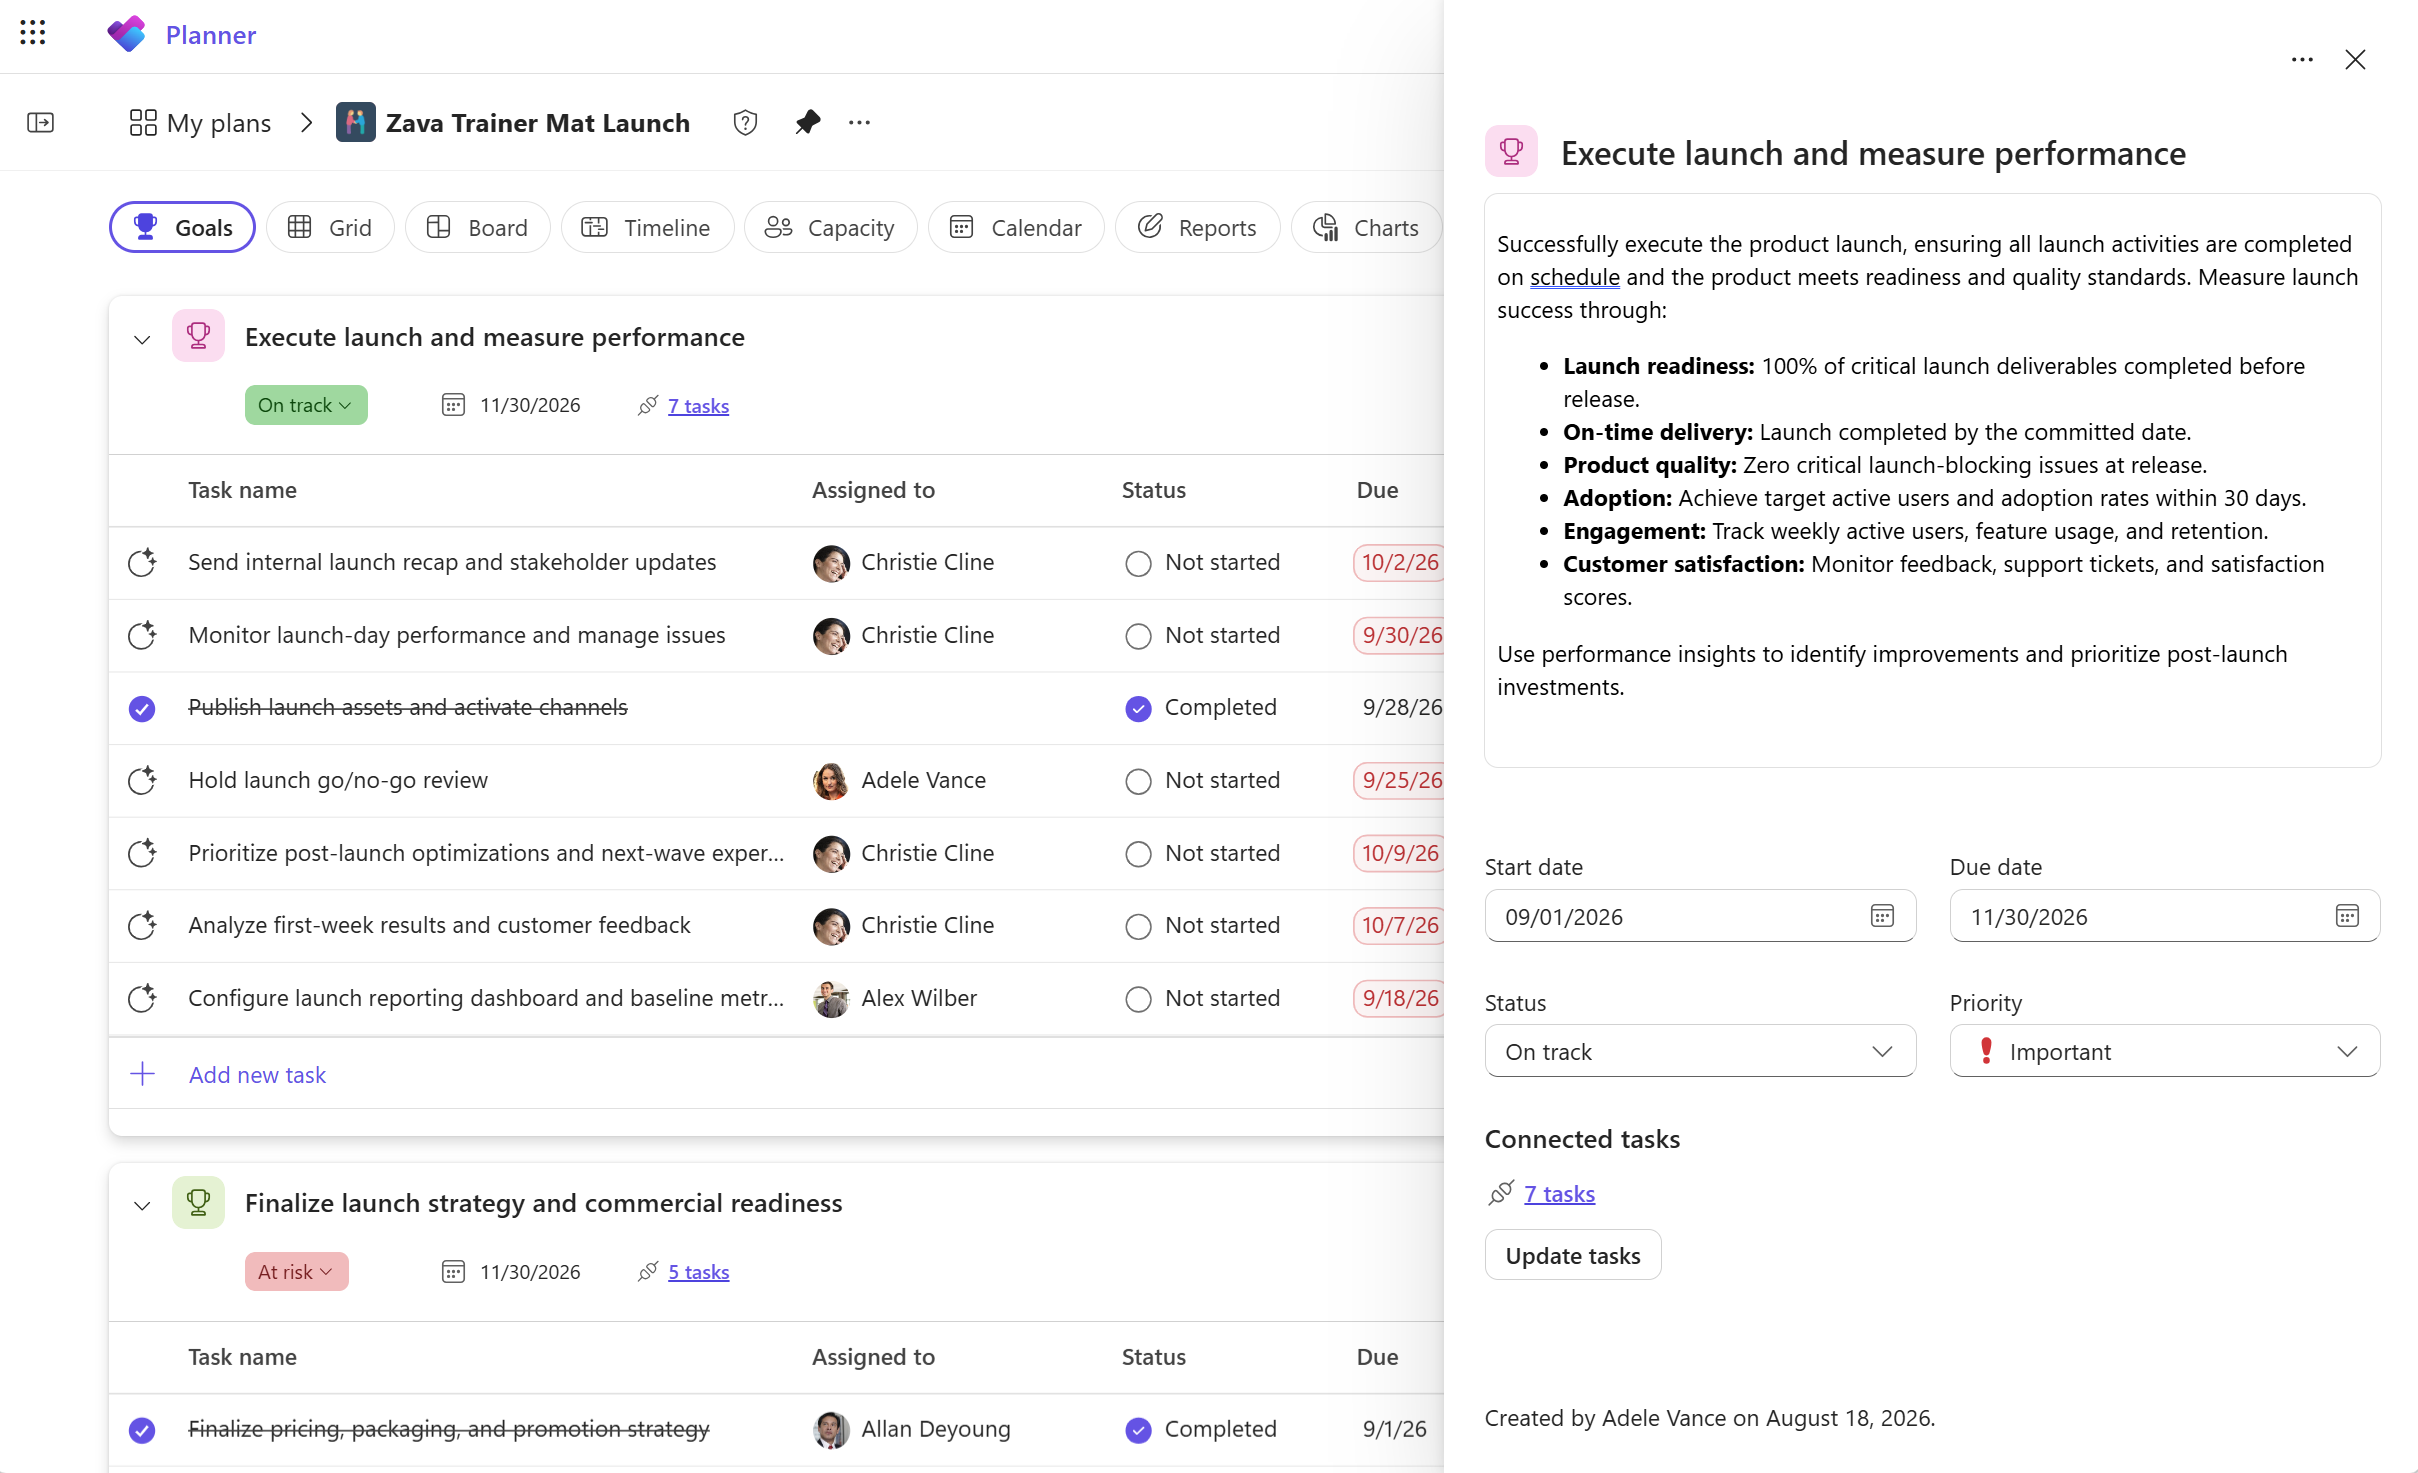
Expand the goal to see its connected tasks.
Note
A task can be connected to only one goal at a time.
Create a task linked to a goal
- Expand the goal to show its connected task list.
- Select Add new task at the bottom of the list.
- Enter the task details.
- Press Enter.
The new task is created and linked to the goal.
Update goal details
Select a goal name to open the goal details pane. In the pane, you can:
- Add a description to explain what you want to achieve.
- Add a start date.
- Set a priority.
- Edit the end date.
- Update the status to reflect the goal’s progress.
Keep these details up to date as your work changes.
Delete a goal
If you no longer need a goal, you can delete it without deleting its connected tasks.
- In Goals view, open the goal’s More options menu (…).
- Select Delete goal.
- Confirm that you want to delete the goal.
Planner deletes the goal and disconnects its tasks. The tasks remain in your plan.