
Use the Queues app for Microsoft Teams
The Queues app is a native Teams experience that extends the customer engagement capabilities of your organization. This collaborative call handling solution allows team members to manage customer calls and team leads to manage queues, access reports, and analyze data. You can pin the app to the left side of Teams for easy access.
Beginning with surfacing calls in the Call queue, your team can use the Queues app to handle incoming calls, whether they are PSTN or VOIP. You can make outgoing calls on behalf of the call queues or auto attendants that you are assigned to. You can review your call queue metrics and collaborate seamlessly with leads or colleagues within the flow of work. Depending on your permissions, you can monitor call queues and auto attendants in real-time, opt in or opt out your team members, generate performance reports, and configure the call queues and auto attendants.
Note: The Queues app is currently in private preview. Once generally available, it will be included in Teams Premium, an add-on license that provides additional features to make Teams meetings more personalized, intelligent, and secure. To get access to Teams Premium, contact your IT admin.
Launch the app
Once you've been authorized by your IT admin, the Queues app will be ready to use.
-
Select View more apps

-
Find the Queues app.
-
You can pin the app to the bar by right-clicking it and selecting Pin.
View the call queue
Depending on how your organization is structured, you may have several call queues you can opt in to. From the Queues app, you can see available queues to join along the top of the window.
-
Select the queue you would like to opt in to.
-
Click Opt in.
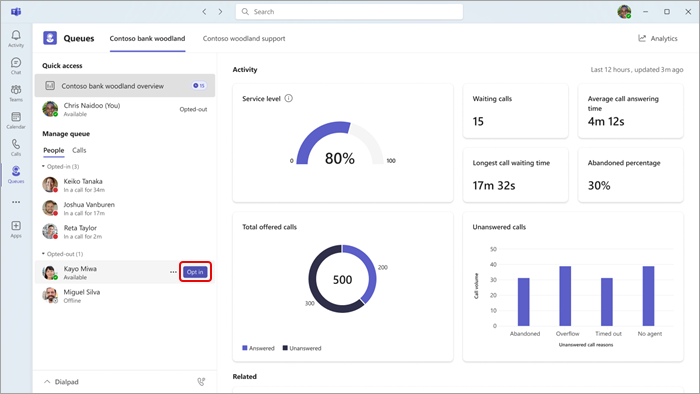
Once opted in, you will start to receive calls from this queue. To opt out, return to the same button and select Opt out. This will remove you from the list of opted-in team members, and you will stop receiving calls.
Additionally, team leads can opt in or opt out their team members directly. Hover over their name and the Opt in/Opt out button will appear.
Note: If Presence-based routing is turned on in Call settings, team members must be both opted in and have their status set to Available in order to receive calls.
Interact with your team
Your teammates are grouped by their opt in/opt out status. To send a message or initiate a call, simply select a team member from the menu.
-
Under Manage queue, select People.
-
Click on the name of the person you would like to interact with. If you call a team member this way, you will have the option of choosing which phone number the outbound call uses.
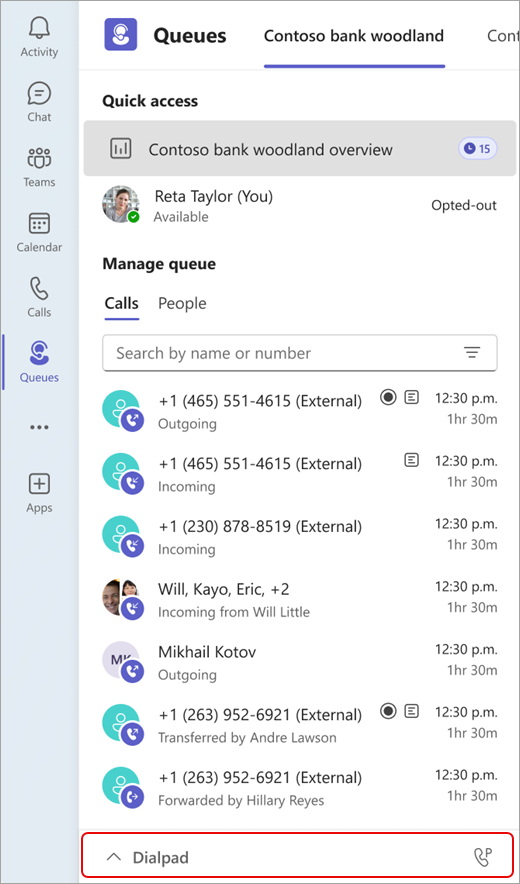
Use the dialpad
Select Dialpad from the bottom left corner of the window to expand the view. From there, you can place outgoing calls.
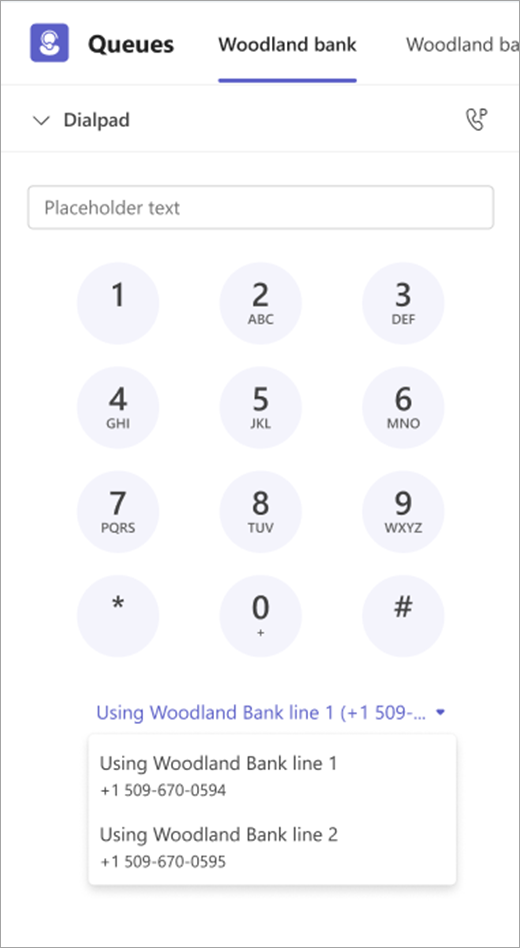
If your organization has multiple outbound numbers to choose from, you will see a dropdown appear above the Call button, allowing you to choose which number you’d like to place outbound calls with.
View call history
To view past calls, including calls or voicemails you may have missed, select Calls under Manage queue.
You can select any call in your history to see more detailed information and call that number back using the number associated with your call queue.
Currently, call history includes the past calls that you have picked up or calls that you have missed that have a voicemail.
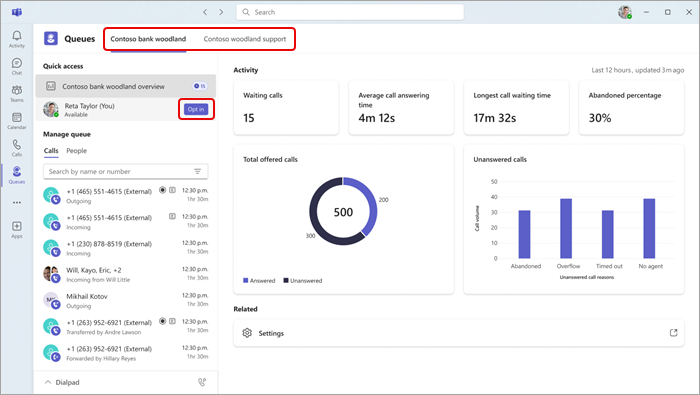
View real-time statistics
If authorized by your IT admin, you can see real-time statistics for your call queue, such as total number of calls in the queue, average call time, and longest wait time. The available statistics are based on your admin settings, and new metrics may come available in the future.
There are two ways to find your analytics dashboard.
First, when you have a queue selected, you will see an overview for that queue at the top of Quick access on the left side of the Teams window.
Second, to see a wider range of analytics for all of your queues, your team members, and your auto attendants:
-
Select Analytics in the top right corner of the window.
-
Select the queue, auto attendant, or team member you’d like to see the analytics for from the dropdowns.
Related topics


Need more help?
Want more options?
Explore subscription benefits, browse training courses, learn how to secure your device, and more.


Communities help you ask and answer questions, give feedback, and hear from experts with rich knowledge.


