Publish a Viva Amplify publication
Applies To
The ability to publish to multiple distribution endpoints with just one click is a powerful feature in Viva Amplify that can save content creators a lot of time and effort. With this capability, you can distribute content to a variety of channels simultaneously, such as Outlook, SharePoint, and Teams. This article provides guidance on how to prepare for publishing after the content is created and previewed and customized in the respective channel editors. Additionally, this article outlines how to resolve any publishing errors that may occur By following these guidelines, you can ensure that your content is distributed effectively and efficiently across multiple channels.
First, you'll need to create your main draft.
Add your audiences for each distribution channel
Add an audience in Outlook
From your preview or customize view for Outlook, select the Add audience icon to open the audience selection pane.
You can add either individual email addresses or distribution lists. The publication will be sent as one email to all recipients on the to, cc, and bcc lines.
Notes:
-
The to field needs to contain at least one email address for the email to be successfully sent.
-
There is a limit of 200 email addresses or groups that can be entered.
-
If you send the email as BCC only, the email recipient won't be able to see the other recipients the email has been sent to.
Import a list of emails
To save time, you can import a list of email addresses.
-
Select Import from file.
-
Choose whether you want the email addresses in the file to be on the To, Cc, or Bcc line and select Import.
-
In the SharePoint file picker, choose the document you want to import, then choose Select. You can select a file from a SharePoint site, OneDrive, a link, or upload.
-
Once you’ve selected your file, choose Import.
-
The email addresses from the file will appear in the To, Cc, or Bcc field depending on your selection. If you’ve entered any invalid email addresses, they’ll appear in red.
-
If you need to clear the email addresses, select Clear all.
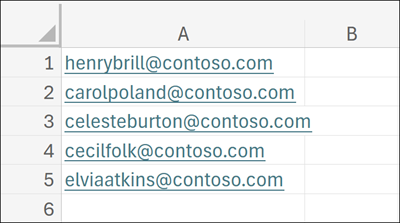
Your file needs to be in a .csv, .txt, or .xlsx format with valid emails starting from row one. Only the first column will be scanned. Amplify can’t import a file over 200 MB.
Select sites to publish to in SharePoint
The SharePoint distribution channel allows you to select a total of 5 sites you can publish your page to. You can enter a part of the name of the site or type in the URL and select the site you want to publish to.
Note: Viva Amplify doesn't support subsites, including publishing to subsites.
Select channels to publish to in Teams
To select the channel your teams message will appear in teams, start typing the channel name in the field. If multiple names for the channel exist, you'll see up to five channels.
Select communities to publish to in Viva Engage
You can choose to either publish to your personal storyline or up to five communities. You can Add people to tag them in the post.
Choose how to publish
Once you've reviewed your content, updated the sender, and chosen your audience(s), you can publish your content.
From the Distribution channel preview
Once you've saved your content, you'll be able to see previews of how it will appear for each distribution channel you've selected. You can publish from here by choosing Publish from the command bar.
From the campaign overview or Publications page
Under the publication you want to publish, select the Publish button.
Publish now
-
Select the Publish dropdown menu and choose Publish now.
-
Review the publication summary to confirm the distribution channels. Once everything looks good, select Publish.
Schedule to publish at a specific date and time
-
Select the Publish dropdown menu and choose Schedule to publish.
-
Review the publication summary to confirm the distribution channels. Once everything looks good, select Next to proceed.
-
On the Schedule to publish panel, choose a date in the calendar. Then enter a time.
Notes:
-
You can schedule to publish up to 30 days in advance.
-
It may take a few minutes after your scheduled publish time for the publication to appear in the selected distribution channels.
-
-
When you're ready, select Schedule to save your changes and schedule your publication.
If you need to get your publication approved before you publish it, you can also request approval.


