Request approvals for Viva Amplify publications
Applies To
Imagine that you created one or a few publications for a given campaign. You want to request approval from your stakeholders prior to publishing these publications so they can review and catch any issues before the publication is released to its intended audience. Viva Amplify offers a quick and easy approval workflow for communicators to get their content created, reviewed, and approved by the right people at the right time.
You can choose to require approvals for all publications in your campaign. Campaign members can request approval for publications even when approvals aren't required.
Before you begin
Install the Approvals app in Microsoft Teams
Before you request approval, ensure that the Approvals app in Microsoft Teams has been properly set up and deployed for your organization. The Approvals app provides a simple way to bring auditing, compliance, accountability, and workflows to both structured and unstructured approvals in Teams. Learn more about managing the Approvals app in Microsoft Teams.
Make sure you've met all pre-publishing requirements
Once you've created your content, select in the authoring panel the distribution channels that you would like your publication to be released to.
After you've chosen your distribution channels, select Next to add the respective audience you'd like to reach.
-
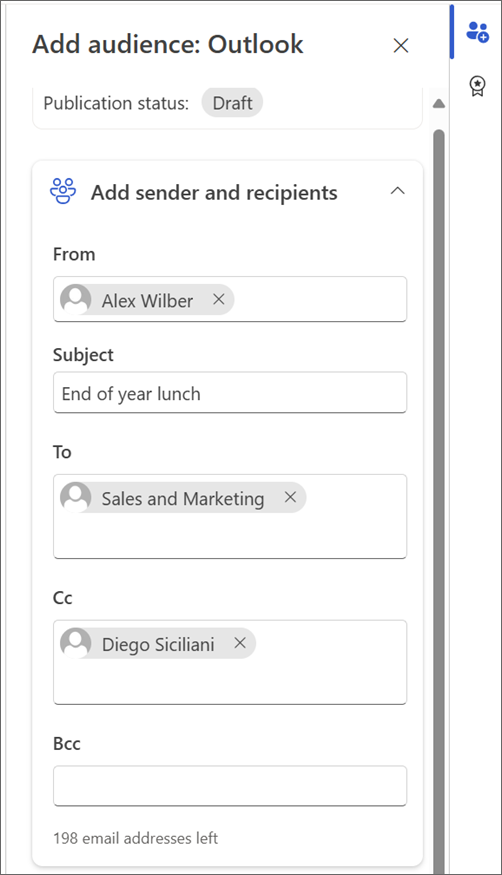
For Outlook, add recipient(s).
-
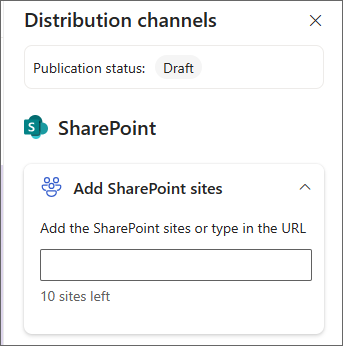
For SharePoint, add site(s).
-
For Teams, add channel(s).
Required approval
Campaigns can contain sensitive information, such as marketing campaign budgets or human resources initiatives. The required approval feature brings compliance and accountability workflows to Viva Amplify approvals.
You can require approval at the campaign level so that all Viva Amplify publications within the campaign go through the approval process before the content is published. This is an optional setting that you can choose to apply to the campaign. By requiring approval, you can ensure that every piece of content meets your quality and security standards and expectations.
-
Navigate to the campaign that you want to require approval for.
-
Select Settings.
-
In the Advanced settings section, move the Require approval for publishing toggle to On. When this setting is on, all new publications will require approval before publishing.
-
Make sure to select Save to keep your changes.
Note: When required approval is on for a campaign, any edit to a publication, including scheduling, will require approval again before publishing. Any campaign member can edit the campaign settings to enable required approvals.
Request approval
Notes:
-
Requesting approval is always available in campaigns.
-
By default, approvals are optional. This means you can choose whether or not to request approval for any or all publications you create.
-
Required approval, when approval is necessary to publish, isn't currently available.
After you meet the pre-publishing requirements, you can request approval for a publication.
-
Select the Publish dropdown and choose Request approval.
-
Review the publication summary to confirm the distribution channels and select Next.
-
In the Approval request details panel, enter the name of the person you want to approve the request.
Important: Only a user with the role of Approver or Owner can be added to the approval request. If you want someone to review and approve a publication, make sure to invite them to the campaign first as an owner or approver. Learn more about user roles in Viva Amplify.
-
Select the checkbox next to Require response from all if you need all approvers to approve the request. If not, you can leave it blank, and one approval will be enough for the publication to be approved.
-
Optional: You can also add additional details to the request or mark the request as important.
-
Select Next to navigate to the publishing options and choose how you want the publication to be released once it's approved. You can choose from three publishing options.
-
Schedule publication: You can choose the date and time that the publication will be released if approved. If it isn't approved by your chosen date and time, it will remain in draft.
-
Manually publish: You can publish yourself after the publication has been approved.
-
Automatically publish: The publication will automatically release across your chosen distribution channels as soon as it's approved.
-
-
When you're done, select Send to save your changes and submit the request. All requests will be sent in the campaign Teams channel and will also be available in the Teams Approvals hub.
-
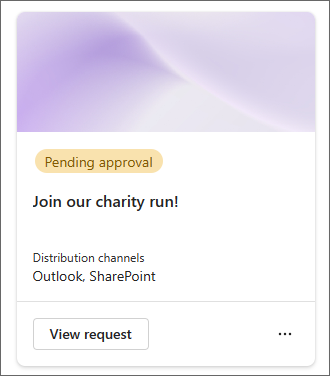
After the approval request has been sent, the publication status will update to Pending approval.
Important:
-
If you need to edit an approval request or edit content on a publication that's pending approval, the previous approval request will be cancelled, and you'll need to request approval again.
-
Approval responses will apply to all distribution channels.
-
You can't create an approval request for an Amplify publication from the Approvals app in Teams. All approval requests need to be created in Amplify.
Respond to an approval request
If a user sends you an approval request for a publication, it will be available in the campaign team channel and in the Teams approval hub. As an approver, you can respond to it directly from within the Teams chat, approval hub or navigate to Amplify directly to respond.
An Amplify campaign shows you all publications pending approval. The approval app will also show you any approvals in the approval hub. You can use both to manage all your approvals. Learn more about how to manage your approvals in Teams.
Approve or reject a request
You can approve or reject a request in Amplify or in Teams.
In Amplify
-
Go to the campaign for which the approval request was sent, then find the publication that is pending approval in the Publication tab.
Tip: You can filter by Pending approval to easily find the publications awaiting approval.
-
Select View request on the on the publication to view all the details of the request.
-
From here, you can approve or reject the publication. You can also include comments with your decision. Once approved, the approval request status will update to Approved on the Teams approval card and app. The publication status will update according to the chosen publication option.
-
Schedule publication: Upon approval, the publication will be scheduled. The publication status will be updated to Scheduled.
-
Manually publish: Upon approval, the publication status will update to Ready to publish. You'll have an opportunity to perform a final check before publishing it yourself.
-
Automatically publish: Upon approval, the publication will be automatically published across the selected distribution channels.
-
In Teams
-
You can go to the campaign chat or channel in which you received the approval request to respond. All approval requests are sent to the campaign Teams channel.
-
Select View details on the card in Teams or select the approval to open the form and approve or reject the request. Learn more about how to respond to an approval request in Teams.
Tip: You can find all approvals in the Approvals app in Teams under the Received tab.
-
From here, you can approve or reject the request. You can also include comments with your decision. Once approved, the status will update in the publication and in the card or the app.
View an approval request
In Amplify
Navigate to Amplify Publications tab. You can view and manage all approvals sent or received for a campaign here.
In Teams
Alternatively, you can go to the Approvals app in Teams to view all the approvals you've sent or received.
Cancel an approval request
In Amplify
You can cancel an approval request that's still in progress. Go to the publication that's pending approval, open the approval request, and select Cancel. You can also cancel an approval request by editing a publication that's pending approval.
In Teams
1. Navigate to the Sent tab in the Approvals card in Teams or your approvals hub. Select the approval you want to cancel and select Cancel request.
Reassign an approval request
From the Teams Approvals card of a given request, you can reassign the approval request to a user of your choice. Before doing so, make sure that the user has been added to the campaign so they can have access to the campaign. Otherwise, the campaign owner will need to grant them access if they wish to view the campaign publication.
Note: You can only reassign approval requests from the Approvals app in Teams.
-
Select Reassign and add the user(s) you want to reassign the request to.
-
Select Confirm to save your changes and reassign the request.
Follow up with approvers
Navigate to your approval request in Teams and select Follow up to follow up with approvers to remind them of your request.
Note: You can only follow up using the Approvals app in Teams.
How Viva Amplify stores approvals data
Viva Amplify approval stores data in Dataverse tables following the Power Platform guidelines and policies for data storage. Approvals created using templates may store some data outside the local region. However, this is not applicable for approvals created in Viva Amplify because Viva Amplify approvals don't use templates. As a result, Viva Amplify approvals data is always stored in the local region.


