Secure your business
A critical part of running your business these days is doing so securely. Fortunately, Microsoft 365 gives you a lot of tools to help you do that and it's easy to turn them on.
Click the headings below for more information
If criminals get the username and password of you or one of your team, they'll try to sign into your system to see what they can take. Using multifactor authentication makes it much harder for them to get in, even if they do have your username and password.
Tip
Want to know more about multifactor authentication? See What is: Multifactor Authentication.
To confirm multifactor authentication is on:
-
Go to the Microsoft 365 admin center at https://admin.microsoft.com.
-
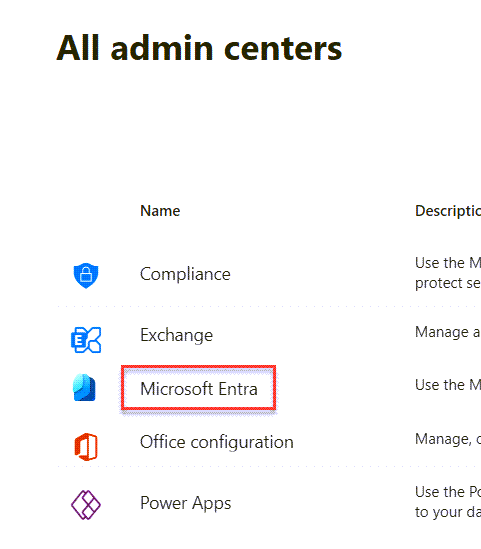
Select Show all, then All admin centers to display the additional admin centers, and then select Microsoft Entra.
-
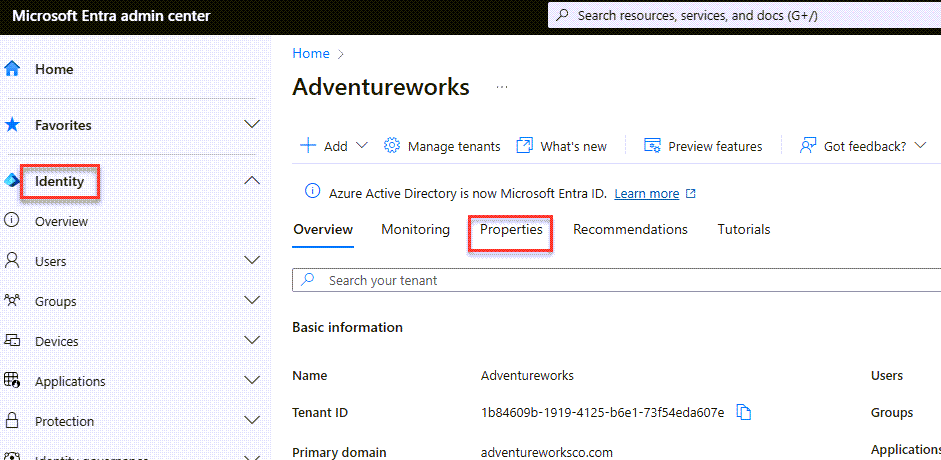
Select Identity from the navigation on the left, then Properties.
-
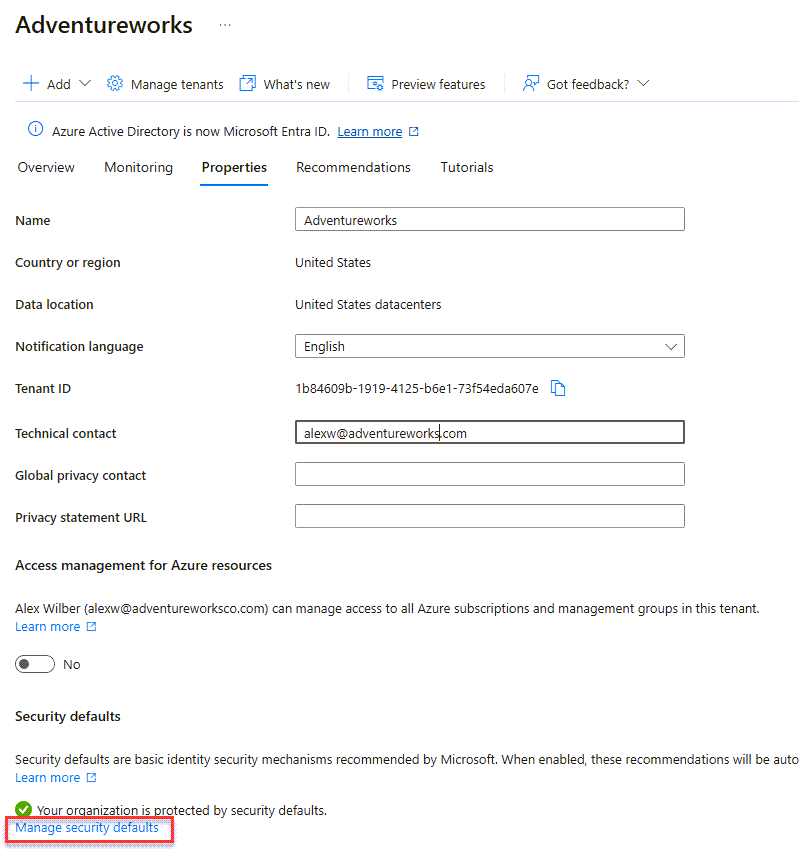
Select Manage security defaults from the bottom of the page.
-
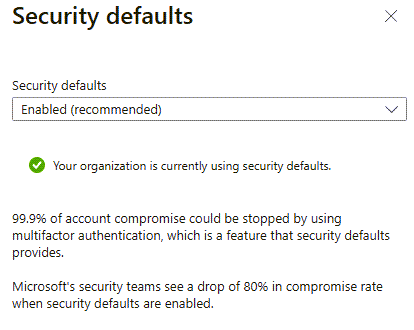
On the panel that opens to the right, Enabled (recommended) should be select. If not, select it from the menu and then select Save.
If you have to enable the setting, the next time you sign into Microsoft 365 you'll be prompted to set up the Microsoft Authenticator app as a second factor. It should take just a couple of minutes to download and set up the app on your Android or iPhone. Once it's set up, you're all set. For more details on how to do it see Set up Security info from a sign-in page.
For regular users it should rarely ask for the second factor when they sign into the device they always sign into. For admin users it may ask a little more often due to the sensitive nature of an admin account.
Phishing messages are often cleverly disguised to look like a message from a person or organization you trust. If you do a lot of business with alexw@contoso.com you're inclined to trust Alex and you might not notice if a message came in from alexw@contos0.com during a busy day.
Microsoft 365 can add a safety tip to that message alerting you that this is a new sender, and that might give you a chance to pause and recognize that this message is from an imposter.
To turn on the first contact safety tip.
-
In your browser sign into https://security.microsoft.com/antiphishing.
-
Select the default anti-phishing policy from the list.
-
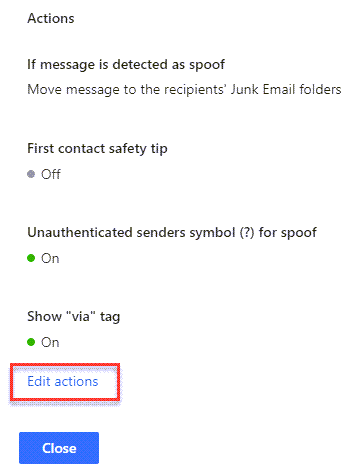
Select Edit actions.
-
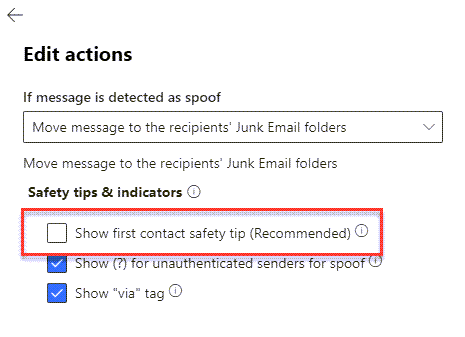
Select the check box for Show first contact safety tip.
-
Select Save.
Microsoft 365 has a set of security features that can help protect your business and to make it easier for you to turn them on we've packaged them as a set that you can turn on together.
-
Go to the Microsoft 365 Defender portal (https://security.microsoft.com) and sign in.
-
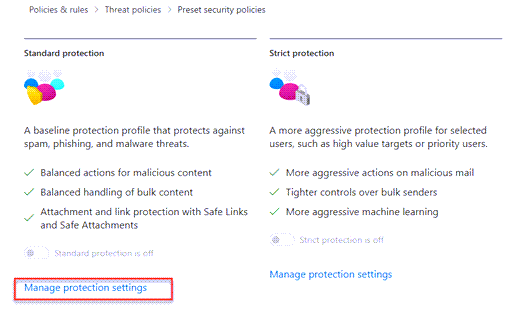
Under Email & Collaboration go to Policies & Rules > Threat policies > Preset Security Policies in the Templated policies section.
-
On the Preset security policies page, in the Standard card, select Manage protection settings.
-
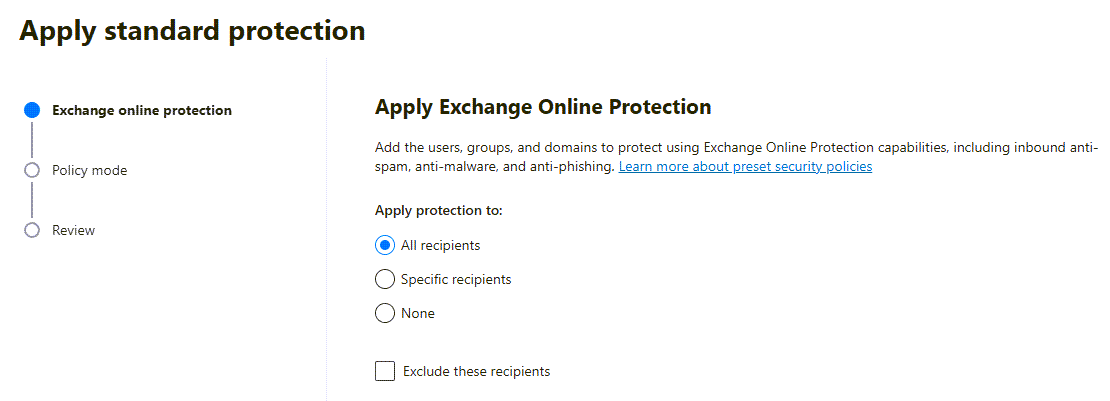
The Apply standard protection wizard starts in a flyout. On the Exchange Online Protection page select All recipients. You want these protections to apply to everyone in your business. Then select Next.
-
Leave the setting to Turn on the policy after I finish so that the settings will take effect right away and select Next.
-
Review your settings and select Confirm to finish.


