I can't record a meeting in Microsoft Teams
Applies To
What if you want to start a recording during a meeting in Microsoft Teams, but the recording button is unavailable? We have some tips to help you complete your task.
Hover over the Lock icon on the Start recording button to see a tooltip explaining why the button isn't working. Then, check the table below to find a solution.
|
Tooltip |
Reason |
What you can do |
|---|---|---|
|
Only people in this org can start recording |
You're an anonymous user. Or You belong to a different organization than the meeting organizer. You're either an external party or signed in as a guest in the meeting. |
Sign in to an authenticated account. Ask a meeting participant from the organizer's org to start and share the recording after the meeting. |
|
Unavailable for this meeting due to organization policy. Reach out to your IT admin to get access. If the policy is updated, it may take time to take effect. |
The Teams admin hasn't allowed recording for individuals in meetings. Learn more about allowing or preventing users from recording. Or Your IT admin has just changed the meeting recording policy, but the change hasn't taken effect yet. |
Ask your admin to turn on the recording option in meetings for everyone. After that, please allow some time for the change to take effect. |
|
Unavailable for this call due to organization policy. Reach out to your IT admin to get access. If the policy is updated, it may take time to take effect. |
The Teams admin hasn't allowed recording for individuals in calls. Learn more about how to enable call recording. Or Your IT admin has just changed the calling recording policy, but the change hasn't taken effect yet. |
Ask your admin to turn on the recording option in calls for everyone. After that, please allow some time for the change to take effect. |
|
Unavailable in this meeting |
If the meeting organizer isn't allowed to record in the meeting policy, the recording button isn't available to any meeting attendees. Or If the meeting is scheduled with the Microsoft Graph API and the meeting organizer sets the AllowRecording property to False, the recording button isn't available to meeting attendees. Learn more about onlineMeetingBase properties. |
Ask your admin to let the meeting organizer record meetings. Or Ask the organizer to close the current meeting, turn on the recording property, and start a new meeting. |
|
Only meeting organizer and co-organizer can start recording for this meeting. Reach out to the meeting organizer for access. |
In the Teams meeting options, under Recording & transcription, the meeting organizer can set the Who can record and transcribe option to designate who can start recording. If the option is set to Organizer and co-organizers, the recording button is unavailable for all attendees except the organizer and co-organizers. |
Ask the organizer to change the Who can record and transcribe option to Organizers, co-organizers and presenters. Learn more about choosing who can record or transcribe. Or Ask the organizer to designate you as a co-organizer. Learn more about roles in Microsoft Teams meetings. |
|
Unavailable because the meeting organizer has disabled recording for this meeting. Reach out to the meeting organizer for access. |
In the Teams meeting options, under Recording & transcription, the meeting organizer can set the Who can record and transcribe option to No one. |
Ask the organizer to change the Who can record and transcribe option. Learn more about choosing who can record or transcribe. |
|
Only meeting organizers and presenters can start recording |
In the Teams meeting options, under Roles, the meeting organizer sets the Who can present option to designate who can start a presentation. If you aren't designated as a presenter, you'll be marked as an attendee in the meeting, but the recording button won't be available to you. |
Ask the organizer to designate you as a presenter. Learn more about roles in Microsoft Teams meetings. |
|
Recording has already started |
When you select Start recording, the recording takes a few seconds to start. During this time, the Start recording button isn't available to you. |
Wait until the recording starts. |
|
Unavailable because Copilot is turned off for this meeting. To enable it, ask meeting organizer or co-organizer to allow Copilot in meeting options. |
In the Teams meeting options, under Copilot and other AI, if the meeting organizer sets Allow Copilot to Off, the recording button isn't available to any attendees. |
Ask the meeting organizer to turn on Copilot during the meeting. |
FAQ
Why is my meeting recording automatically if I didn’t schedule it that way?
-
If you schedule a meeting or event using the town hall or webinar template, automatic recording and transcription will be on by default. To turn off automatic recording before the meeting or event starts, open the event details in your Teams calendar and select Meeting options
-
If you have a compliance recording policy, recording will start automatically every time you join a meeting. This recording will be stored in your org’s storage and not your personal OneDrive or Microsoft SharePoint. To learn more, see Third-party compliance recording for Teams calls and meetings.
Where are recordings and transcripts saved?
Please see Recording storage.
What do the recording & transcript meeting options do?
When you organize a meeting in Teams, you can adjust recording and transcript settings and permissions in the meeting options. Learn more about recording and transcript options in the table below:
|
Meeting option |
What it does |
|---|---|
|
Record and transcribe automatically |
When this option is turned on, recording and transcription will start automatically when the meeting begins. This option will be turned off if Who can record and transcribe is set to No one. |
|
Who can record and transcribe |
This option controls who can start recording or transcription during a meeting.
Limitations:
|
|
Enable multilingual speech recognition *Teams Premium |
This allows everyone to be understood in the spoken language they set at the beginning of the meeting. This will be turned on automatically if Interpreter is on. To learn more, see Interpreter in Microsoft Teams meetings. |
To learn more, see Customize access to meeting recordings or transcripts in Microsoft Teams.
Can I request access to a recording or transcript?
When you open a recording or transcript that you don’t have access to, you can ask the owner to share it with you directly or request access directly from that page. If you request access, reach out to the recording or transcript owner to let them know your request is waiting. They can approve the request through their email.
How do I manage a recording or transcript’s expiration date in Stream?
To manage a recording or transcript’s expiration date in Stream:
-
Open the recording or transcript in Stream.
-
Make sure you’re in Editing mode. If you’re in Viewing mode, select Viewing > Editing.
-
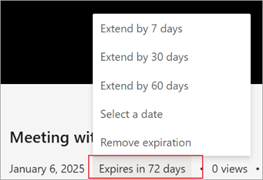
Under the meeting recording, select the current expiration countdown.
-
Select an option to extend the recording, choose a new expiration date, or remove expiration from the recording entirely.
Where is my recording?
If you can’t find a recording:
-
Check if there is a message indicating that your recording started. If you don’t see this message, the recording most likely didn’t start and can’t be recovered.
-
If you can't find the message, it could be due to a service issue when you attempted to start the recording, or because you canceled or closed the confirmation dialog that appears after selecting Start recording. The recording only starts once you select Confirm.
-
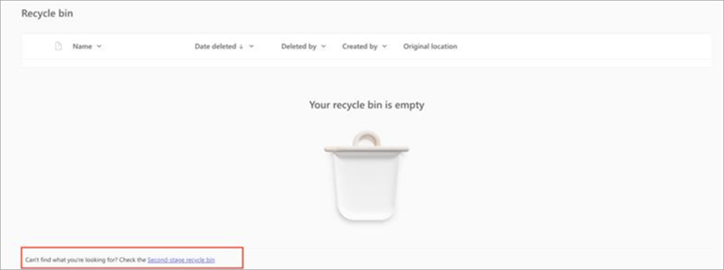
If you know the recording was started but can’t find it in OneDrive, check if it was deleted, moved to a different location, or expired. Look in your recycle bin and second stage recycle bin. See Restore deleted files or folders in OneDrive for more details.
-
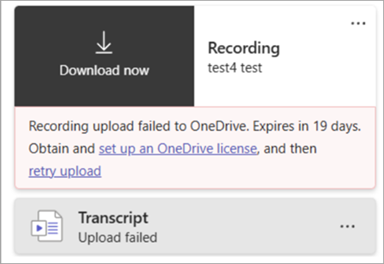
If you can’t find your recording in OneDrive but see the below message with your recording in chat history, your recording failed to upload to OneDrive and will be stored temporarily for 21 days. You can retry uploading it to OneDrive or download it to your local device.
-
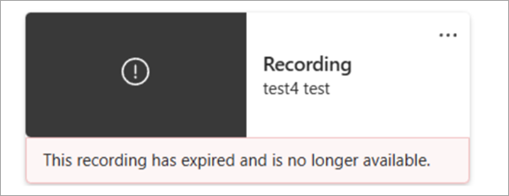
If you see the below message with your recording in chat history, the recording was permanently deleted from temporary storage and can’t be recovered.


