Join a meeting as an avatar in Microsoft Teams
Notes:
-
If you don't have access to the Avatars for Microsoft Teams app, contact your IT admin or see Set up avatars for Microsoft Teams.
-
Avatars for Teams are currently available on the Teams desktop app for Windows and Mac, and are view-only on the Teams mobile app. For more information, see Avatars for Teams release notes.
Avatars for Microsoft Teams add a new layer of choice to your meetings. By customizing your avatar the as you want it to look, you can let people get to know you in a conversation, even with your video turned off.
Jump to a section:
Install the Avatars app
-
On the left side of Teams, select Apps
-
Search and select Avatars.
-
Select Add.
If you don't find Avatars in Apps, select More added apps
Tip: To pin Avatars for easy access, right-click the app and select Pin.
Create a new avatar from a photo
For each of your Teams accounts, you can create up to three distinct avatars. There are many base avatars to help you start and choose the one that fits you best.
-
Select Apps
-
Search for and select Avatars.
Tip: To pin Avatars for easy access, right-click the app and select Pin.
-
Select
Important: The Create from photo feature is currently only available to tenants and users who are opted into M365 Targeted Release.
Tip: You can continue customizing your avatar before finalizing your avatar.
-
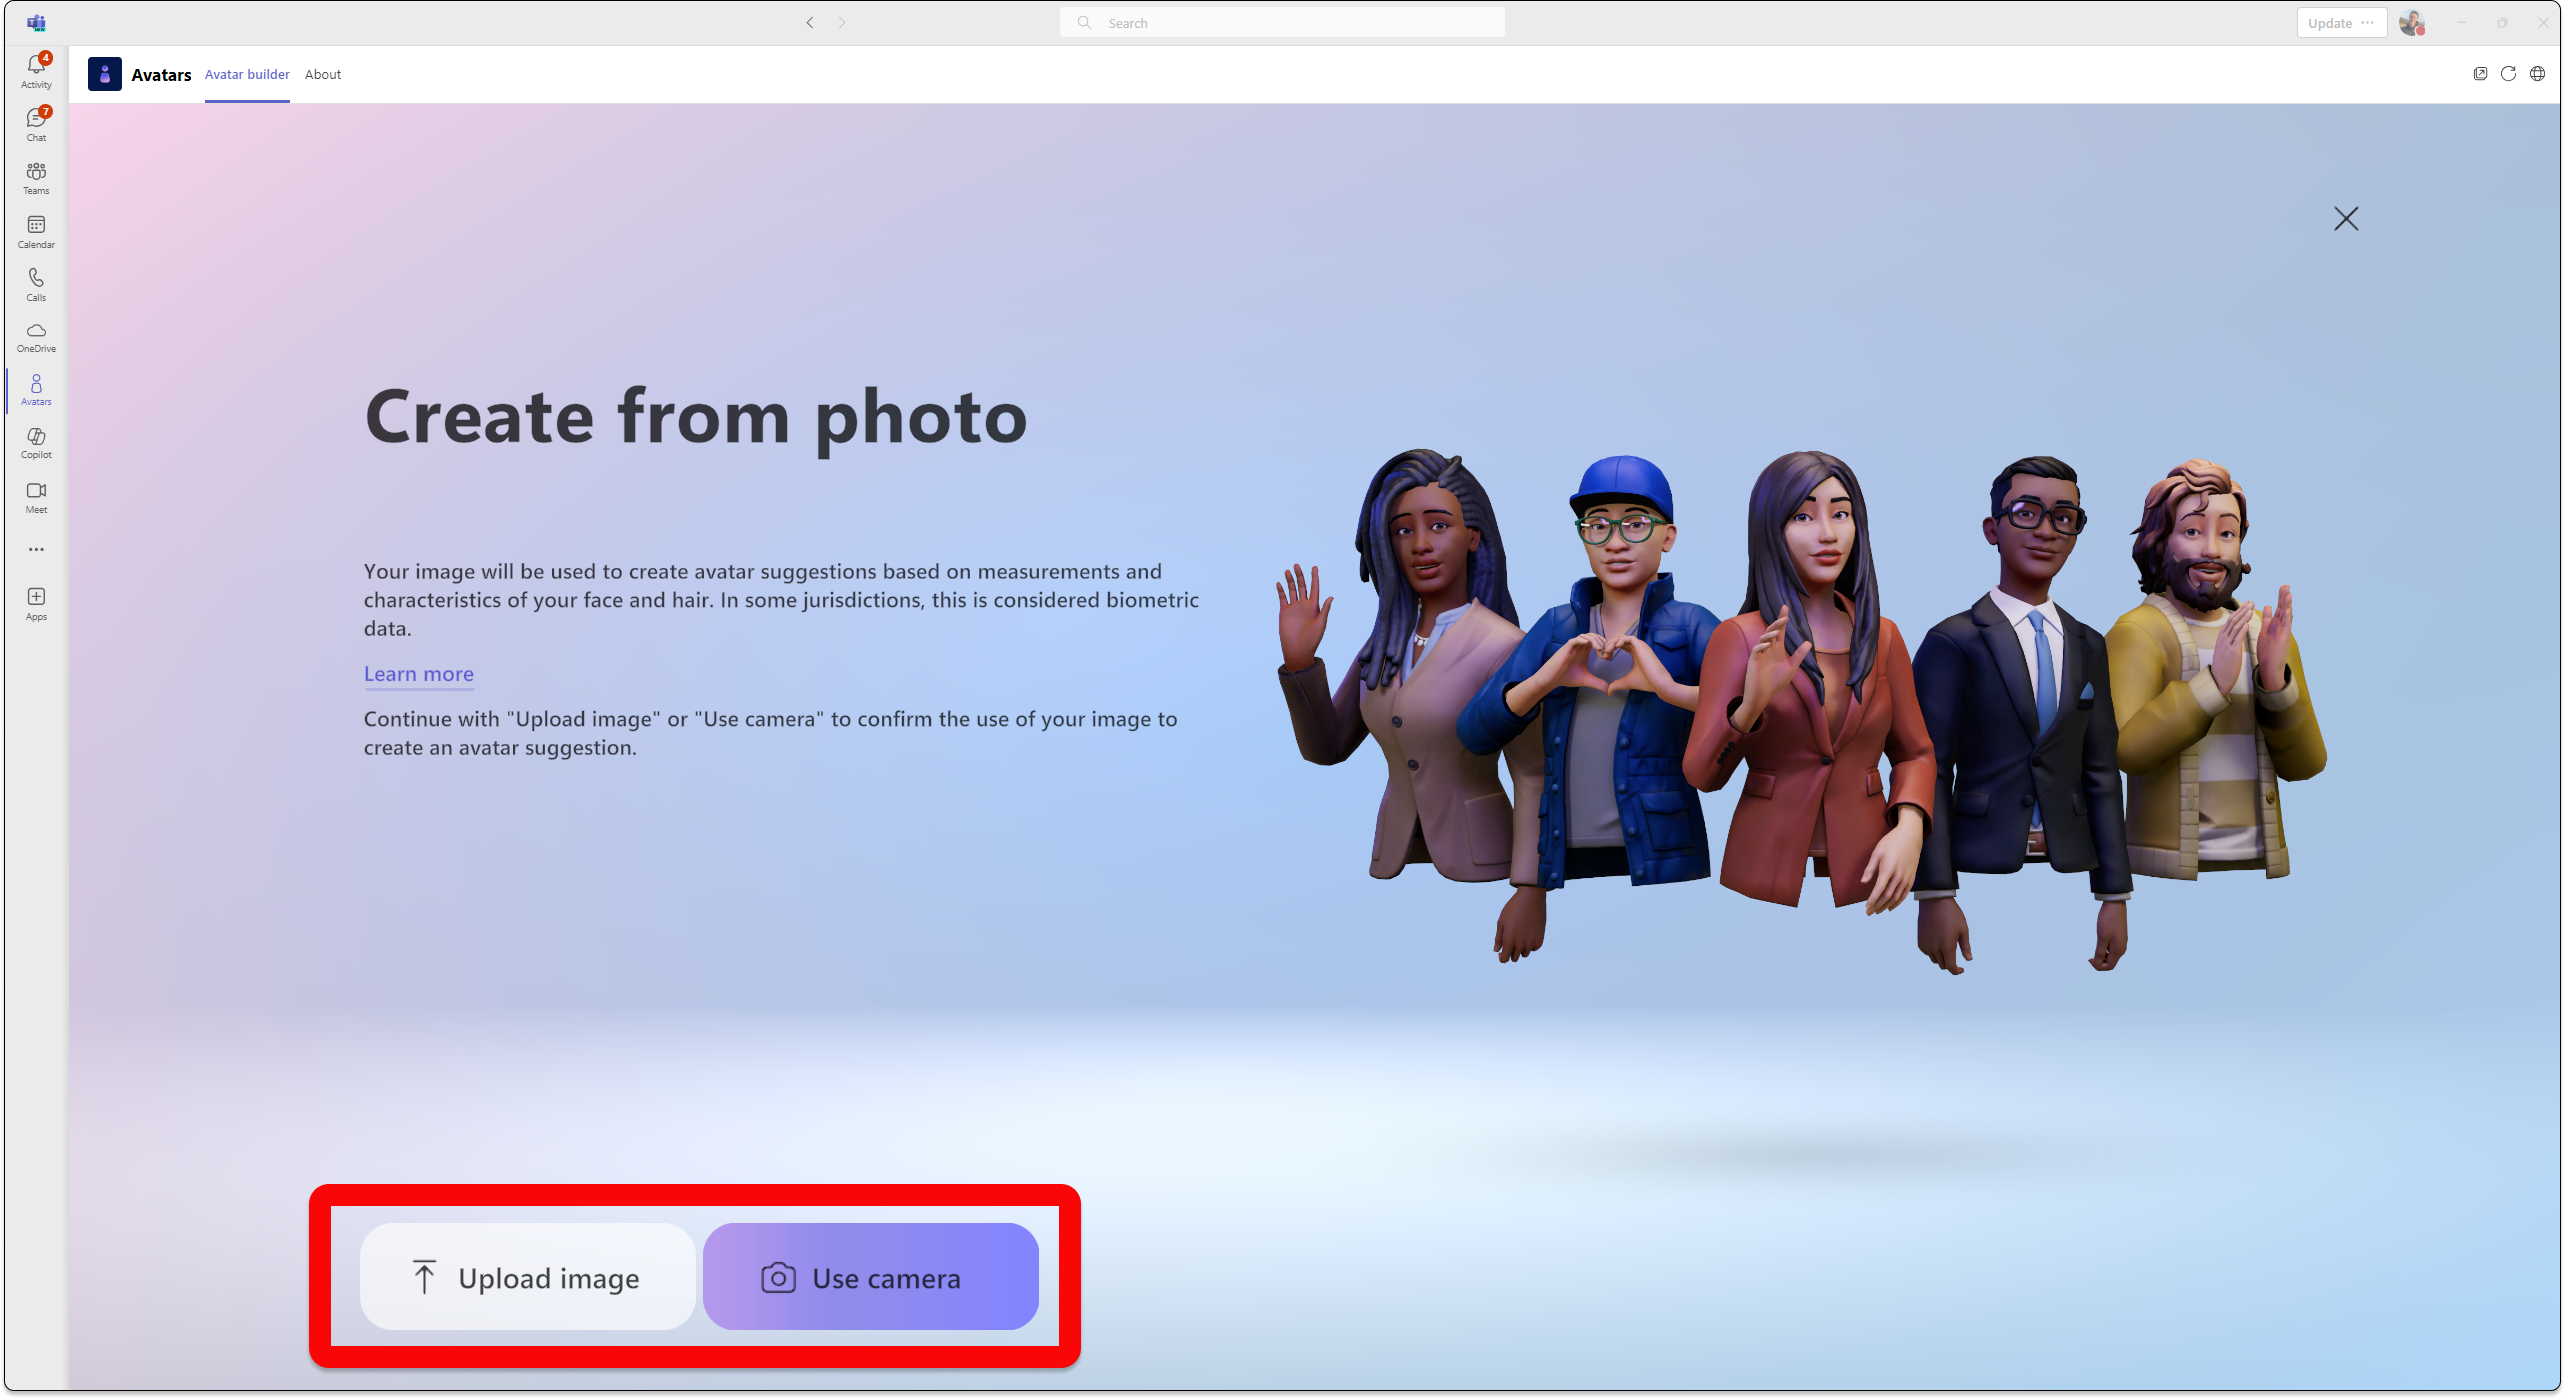
Upload a photo by choosing Upload image. Use the camera on your device to take the photo by choosing Use camera.
Important: Media permissions must be enabled for the Avatars app for the Create from photo feature to work. Your camera feed must be turned off elsewhere in the Teams app for the Use camera option to successfully turn on your camera feed.
-
Once you submit your photo, select your skin tone, then choose your preferred avatar, and select Next.
-
Choose your Body shape and your Outfit.Select Next or select Save and edit to customize further.
Biometric use information
The Create avatars from photo feature recommends avatars to you that most closely match your facial appearance based on a photo of yourself that you submit. To make the avatar recommendations, the Create from photo avatars feature analyzes your submitted photo by detecting points on your face, such as eyes, nose, mouth, and overall face shape and matches it to options available in the avatar builder. It also uses machine learning to predict the most likely style and color of head hair, facial hair, eyebrow hair, and eyewear.
Note: The user's photo isn't retained nor used for any other purpose. The create avatars from photo feature doesn't make any other predictions outside your facial features.
Create avatar from base
-
Select
Join your meetings as an avatar
-
Join a meeting from your Teams calendar.
-
Turn off your camera and select Effects and avatars
-
Choose your avatar or select Create More
Once you’re in a Teams meeting, you can join an immersive space.
Turn on your avatar while in a Teams meeting
-
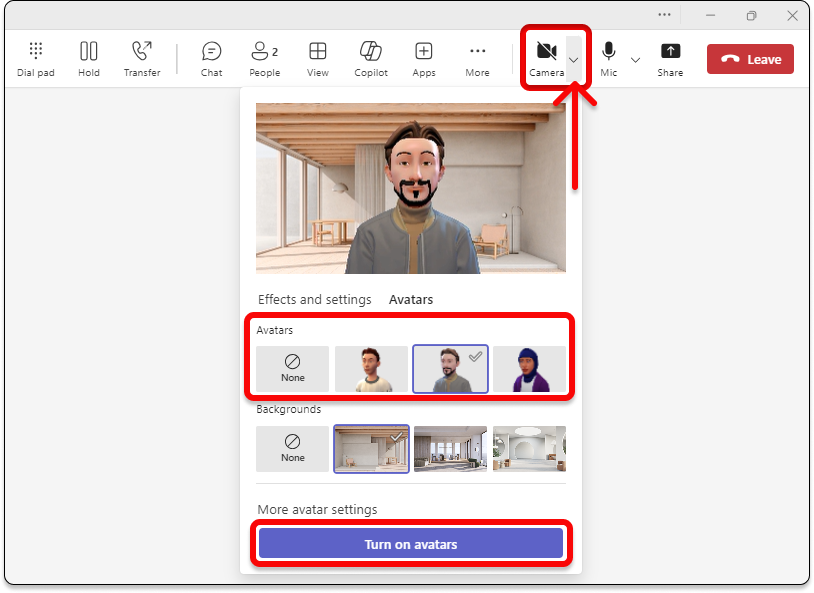
Select the dropdown arrow next to Camera.
-
Select Avatars in the Effects and settings section and choose your avatar.
-
Under Avatars, you'll have up to three different avatars to choose from. Once you've selected an avatar to represent you in the meeting, select Turn on avatars. If you want to edit your avatar, select
Use TTS with the Avatars app
With avatars, you activate the in-app text-to-speech (TTS) system in the avatar customizer. With operating screen readers such as Windows Narrator, you'll be prompted to turn on the TTS system as you enter the application. When you open the Avatar customizer app, focus inside of it. When loading is complete, the system announces, "Press Ctrl + B to activate the TTS system," and TTS is enabled. The TTS system behaves similarly to screen readers.
To ensure that the self-voice TTS system reads out in the correct language, download the appropriate language package in your operating system:
Mac: Change the language your Mac uses
Windows: Language packs for Windows
For the TTS to read in the proper language in Windows, the text-to-speech support must be downloaded for the language pack of choice. You can see the downloaded language features under the language name.
Troubleshooting
To use Avatars for Teams, your computer needs at least a two-core processor with 6GB of RAM. For the best experience, we recommend a four-core processor and 8GB of RAM. To learn more, see Hardware requirements for Microsoft Teams.
Enable media permissions for the Avatars app
For the Avatars app to use the create from photo feature, you must enable access to your camera in the Teams settings.
Common low-bandwidth issues
You may experience the following when using avatars with low bandwidth:
-
Loading your avatar can take up to 10 seconds or more.
-
Avatar wardrobe items might not be saved to your avatar after being selected. If this occurs, try saving again.
-
Selected backgrounds might not be applied to the avatar preview. If this occurs, try selecting a background again.
-
The avatar video stream might flicker green when the Teams video resolution changes.
Frequently asked questions
Can guests in a meeting use Avatars?
Yes, any user who has Avatars set up can use an avatar in the meeting. If they don't, they won't be able to use an avatar even if other people in the meeting can.
Can you use Avatars outside of your organization?
Yes, if you join a Teams meeting as a guest in a different organization, you can use your avatars. However, you must have Avatars enabled in your organization.
Why don't my avatars have legs?
Avatars add a new layer of choice to your meetings, both in 2D and 3D immersive spaces. We're continuously researching and collecting feedback on ways to best represent yourself in Mesh and Teams whether it's improving your likeness, adding options for clothing, creating more realistic avatars, or including full-body representation. Driving improvements in each of these areas comes with its own set of challenges. In particular, representing legs today is a surprisingly complex engineering challenge that involves inferring leg positions without any data that helps describe the actual leg position.
Our goal is to use the latest technologies to their fullest to represent users' likenesses in Mesh and Teams. We'll keep working toward that goal. Please keep sharing your feedback with us so we can improve how people can visually represent themselves in meetings.


