
Manage your contact invitations to control who you connect with in PowerShare. You can view, accept, reject, cancel, or resend invitations from one central location.
Access contact invitations
Go to the Contacts tab.
View your:
- Incoming invitations
- Pending invitations
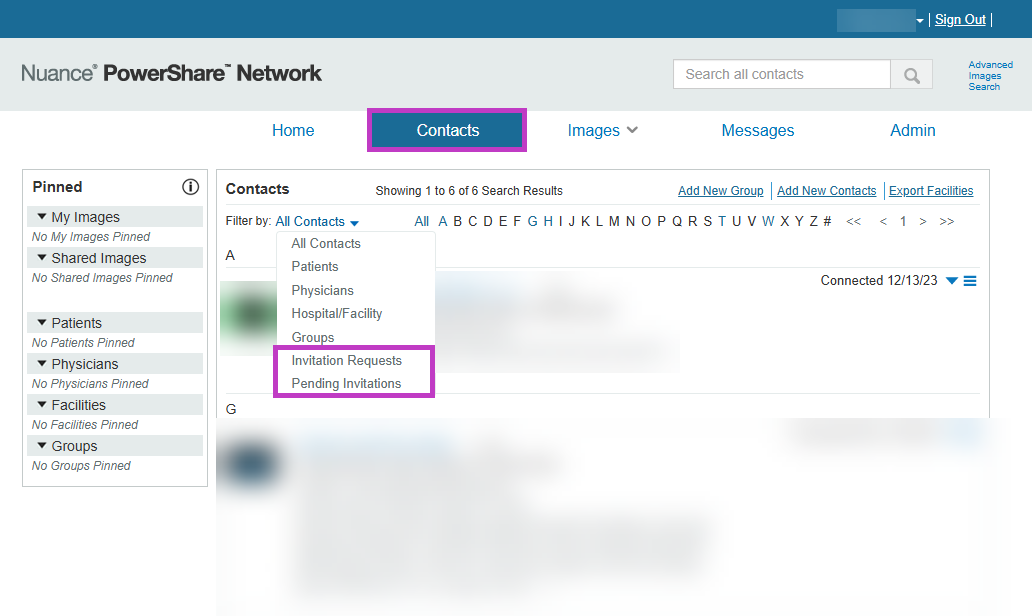
You can manage all invitations directly from this page.
Find invitations
Use search and filters to quickly locate invitations:
Enter a name in the search field.
Select the first letter of a contact.
Use the Filter by option to sort contacts.
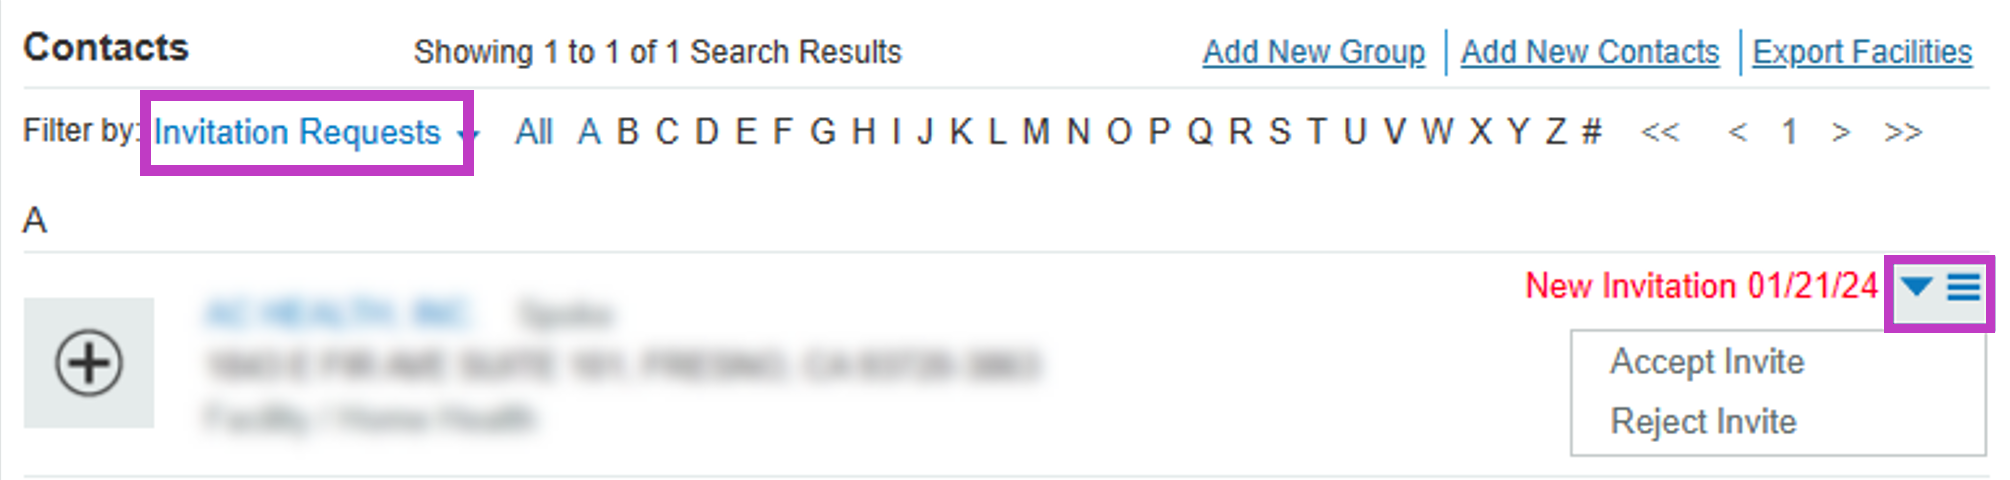
Note
Your selected filters are saved for the next time you visit the page.
View new invitation requests
When you receive a new request:
A notification banner appears at the top of the page.
Select the link in the banner to view the invitation.

Accept or reject an invitation
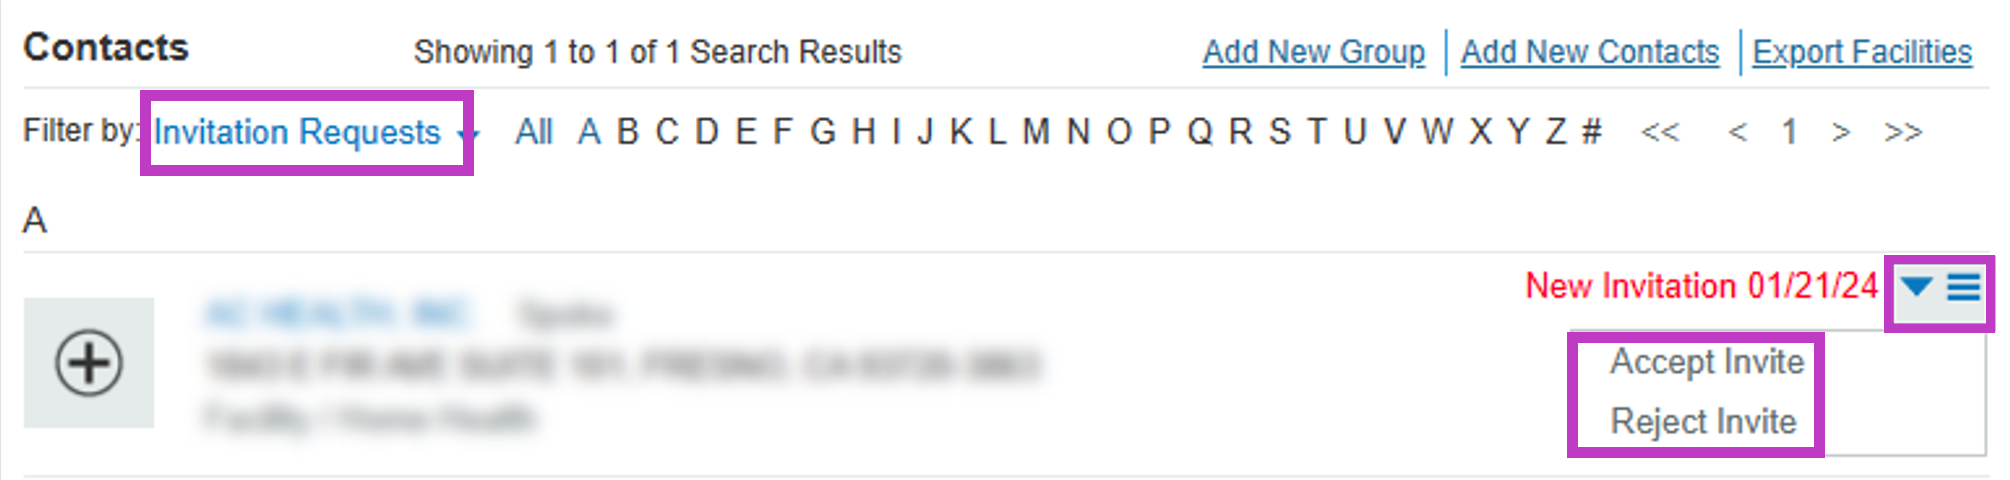
Open the Invitation Requests section.
Select the dropdown next to the invitation.
Choose:
- Accept to connect
- Reject to decline
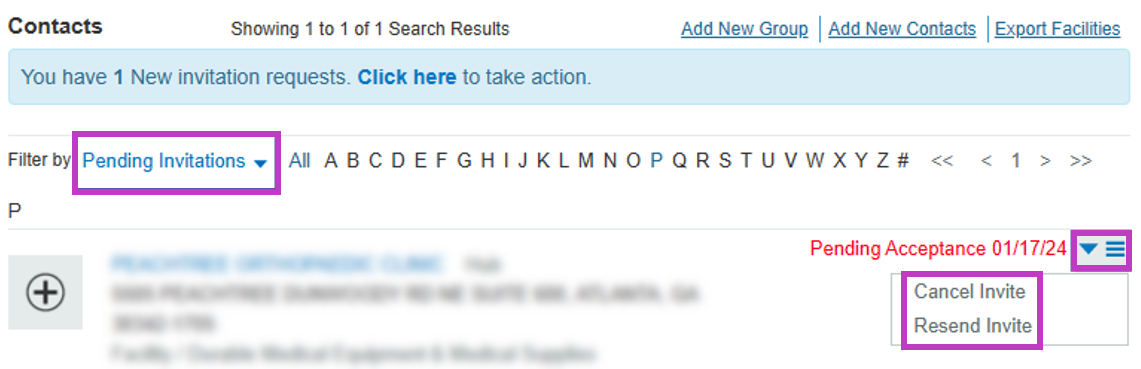
Manage pending invitations
For invitations you already sent:
You can cancel an invitation.
You can resend an invitation.
Automatically accept invitations
You can simplify connections by enabling automatic acceptance for facilities.
Go to Account Admin Dashboard > General Preferences.
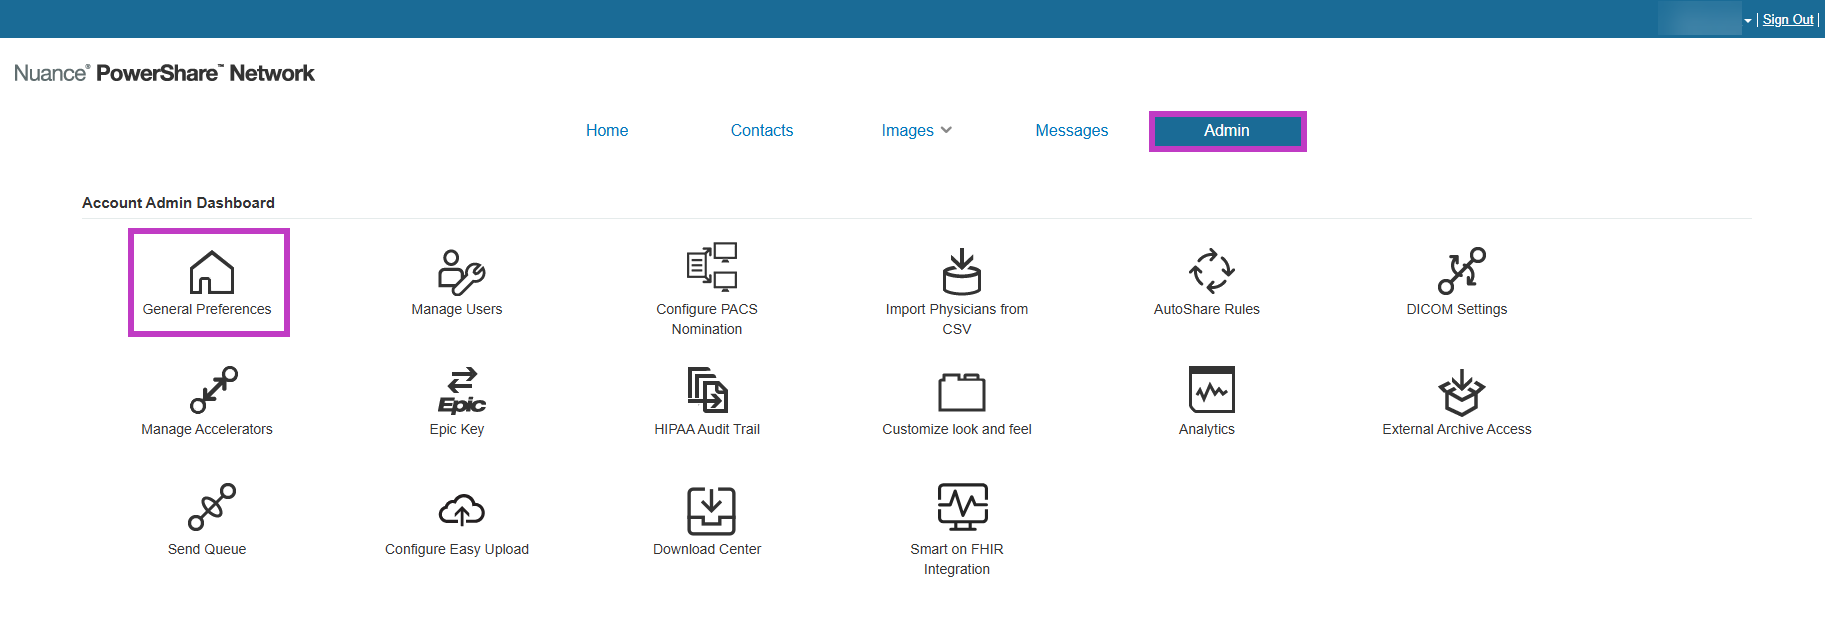
Enable Auto-accept contact invitations from facilities.
Select Save.
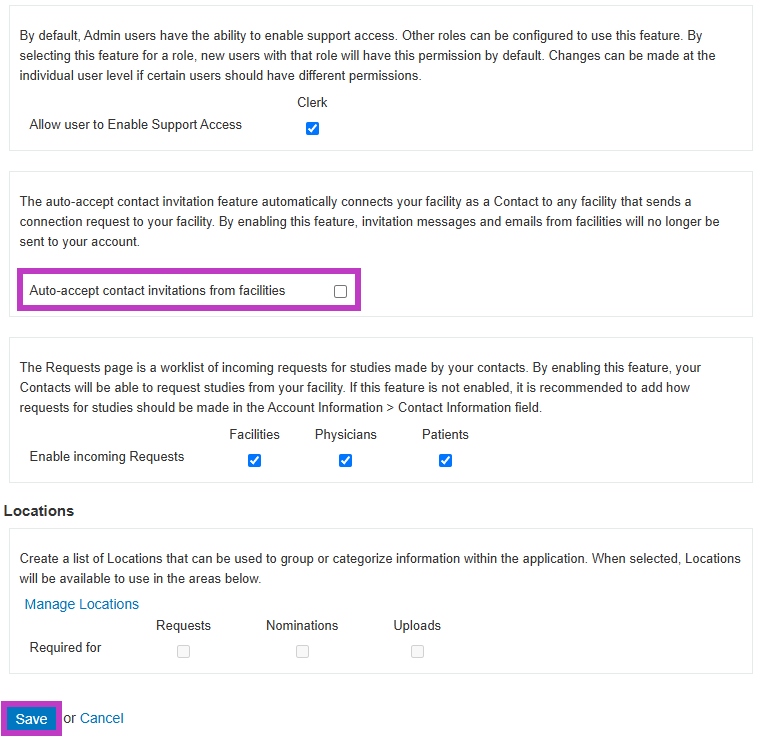
When enabled:
- You connect automatically with facilities that send requests.
- The status shows as Auto Connected.
- You can define default sharing permissions.
Important
- Auto-accept applies only to facilities.
- You continue to receive invitations from providers and patients.
Next up: Create and manage Contacts group in PowerShare Imaging Network
Organise contacts into groups to simplify communication and streamline image sharing workflows. Let's go