
Important
If you work in DAX Copilot for Epic, use this quick start guide.
Welcome to Dragon Copilot. This quick start guide shows you how to get started using Dragon Copilot. Discover how to create your first recording and how to find the AI features and functionality in the application.
Note
The features and functionality available to you might vary based on your organization's configuration, language settings, and whether you're using the web, mobile, desktop, or embedded app.
First, ensure that Dragon Copilot SmartSections are added to your note
Add Dragon Copilot SmartSections to your note in Epic Hyperdrive before recording so you can view the AI summaries that Dragon Copilot generates. Select a current SmartPhrase that already includes the Dragon Copilot SmartSections, or add them manually to a personal SmartPhrase or a note by using one of these dot phrases:
- HPI (.hpisec)
- Assessment and Plan (.apsec)
- Physical Exam (.pesec)
- Results (.resultsec)
Record your first patient encounter
- Open Epic Haiku or Canto on your mobile device and select a patient.
- Select DAX Copilot at the bottom of the screen.

- Select the ambient recording button. Select the same button to stop the recording.

Open Dragon Copilot
Dragon Copilot provides powerful time-saving AI capabilities and clinical insights to help ensure that your clinical documentation is as accurate and complete as possible.
Go to the note. When Dragon Copilot finishes processing your recordings, an alert appears in Hyperdrive. Select Go to Note in the alert to open the Epic Notes activity, or you can manually go to the Notes activity in Epic.
Launch Dragon Copilot. Choose one of these options to launch Dragon Copilot.
Option 1: If enabled, select the button on your EHR toolbar to launch the Dragon Copilot desktop application.
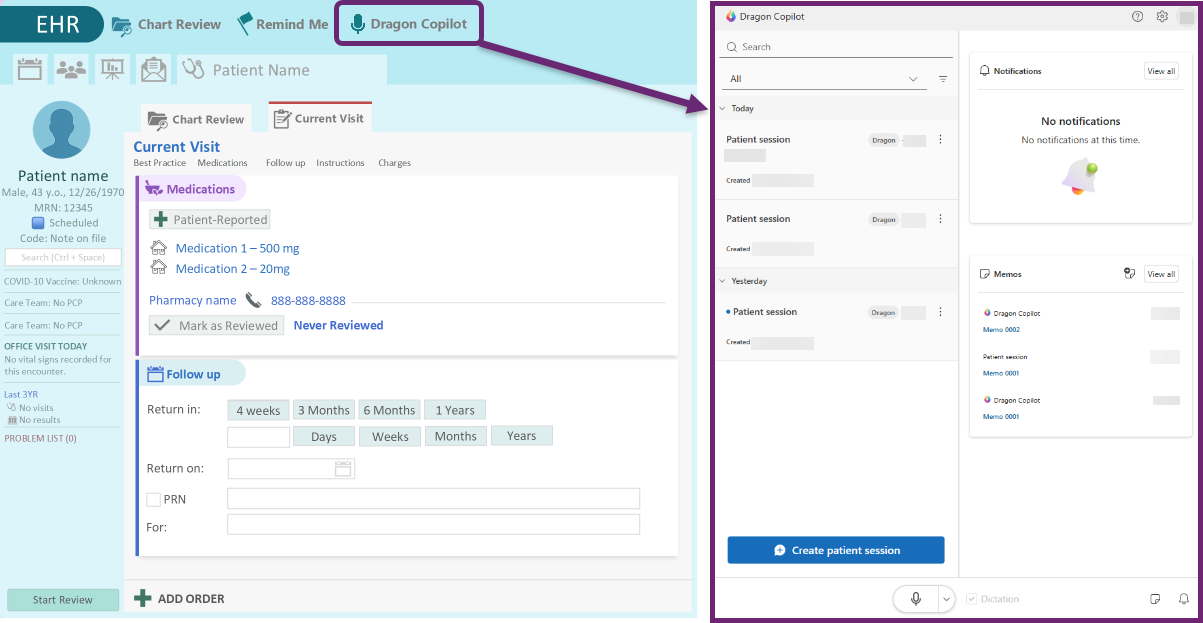
The Dragon Copilot desktop window opens.
Option 2: Find any ambient SmartSection, such as HPI or A&P, and select DAX Copilot or Dragon Copilot from the Action menu.
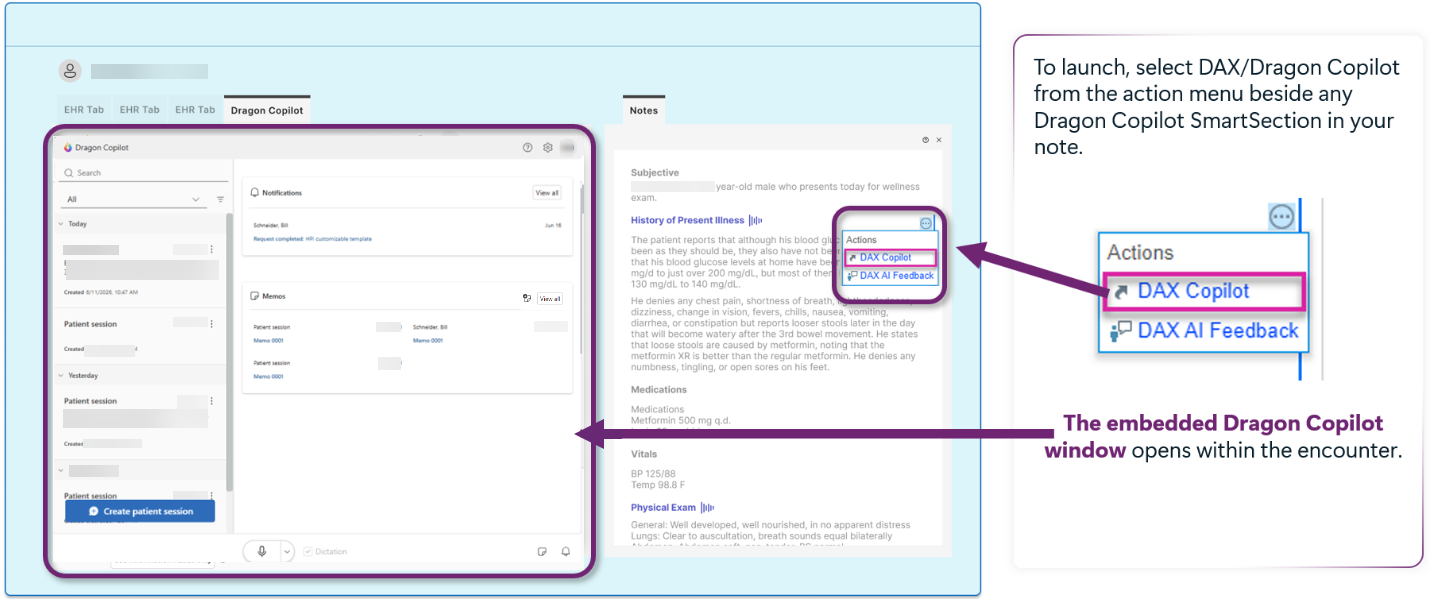
The embedded Dragon Copilot window opens within the encounter.
Tip
If your EHR administrator enables it, you can perform many of the same actions with Dragon Copilot in your EHR mobile app. Follow this link for more information.
Get oriented
Dragon Copilot includes two main work areas:
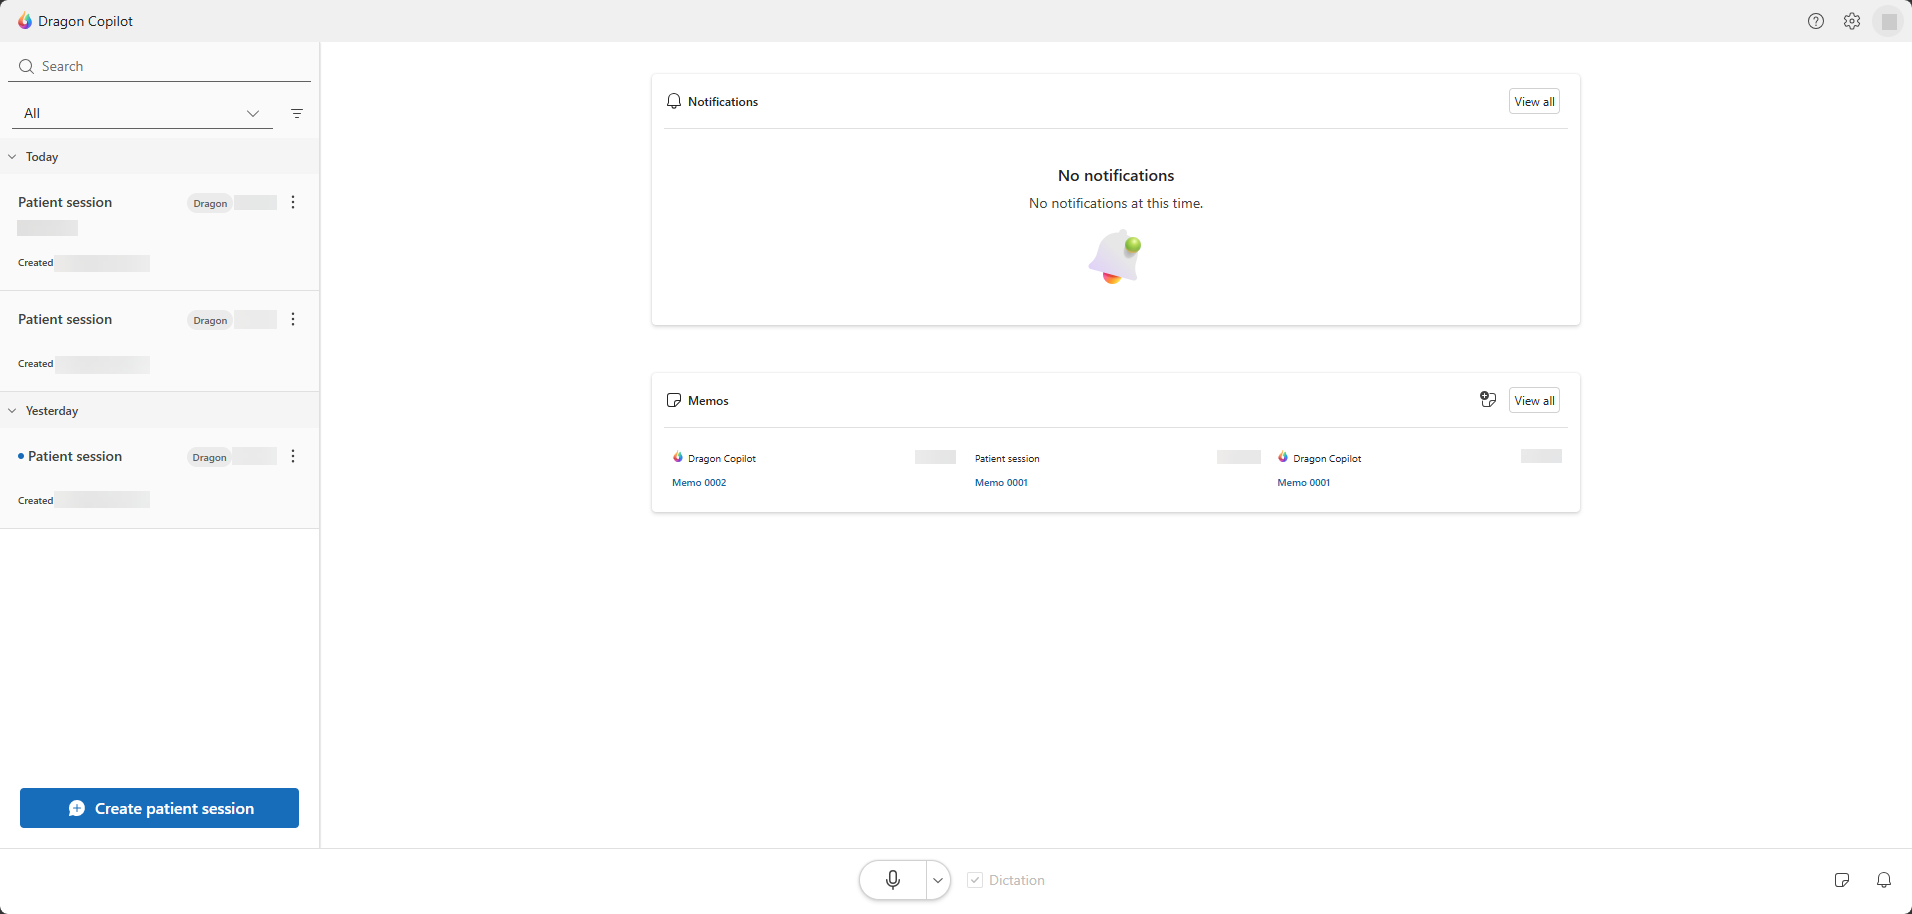
- Homepage: Find patients, open sessions, review notifications and memos, and access settings, help, and other workspace tools.
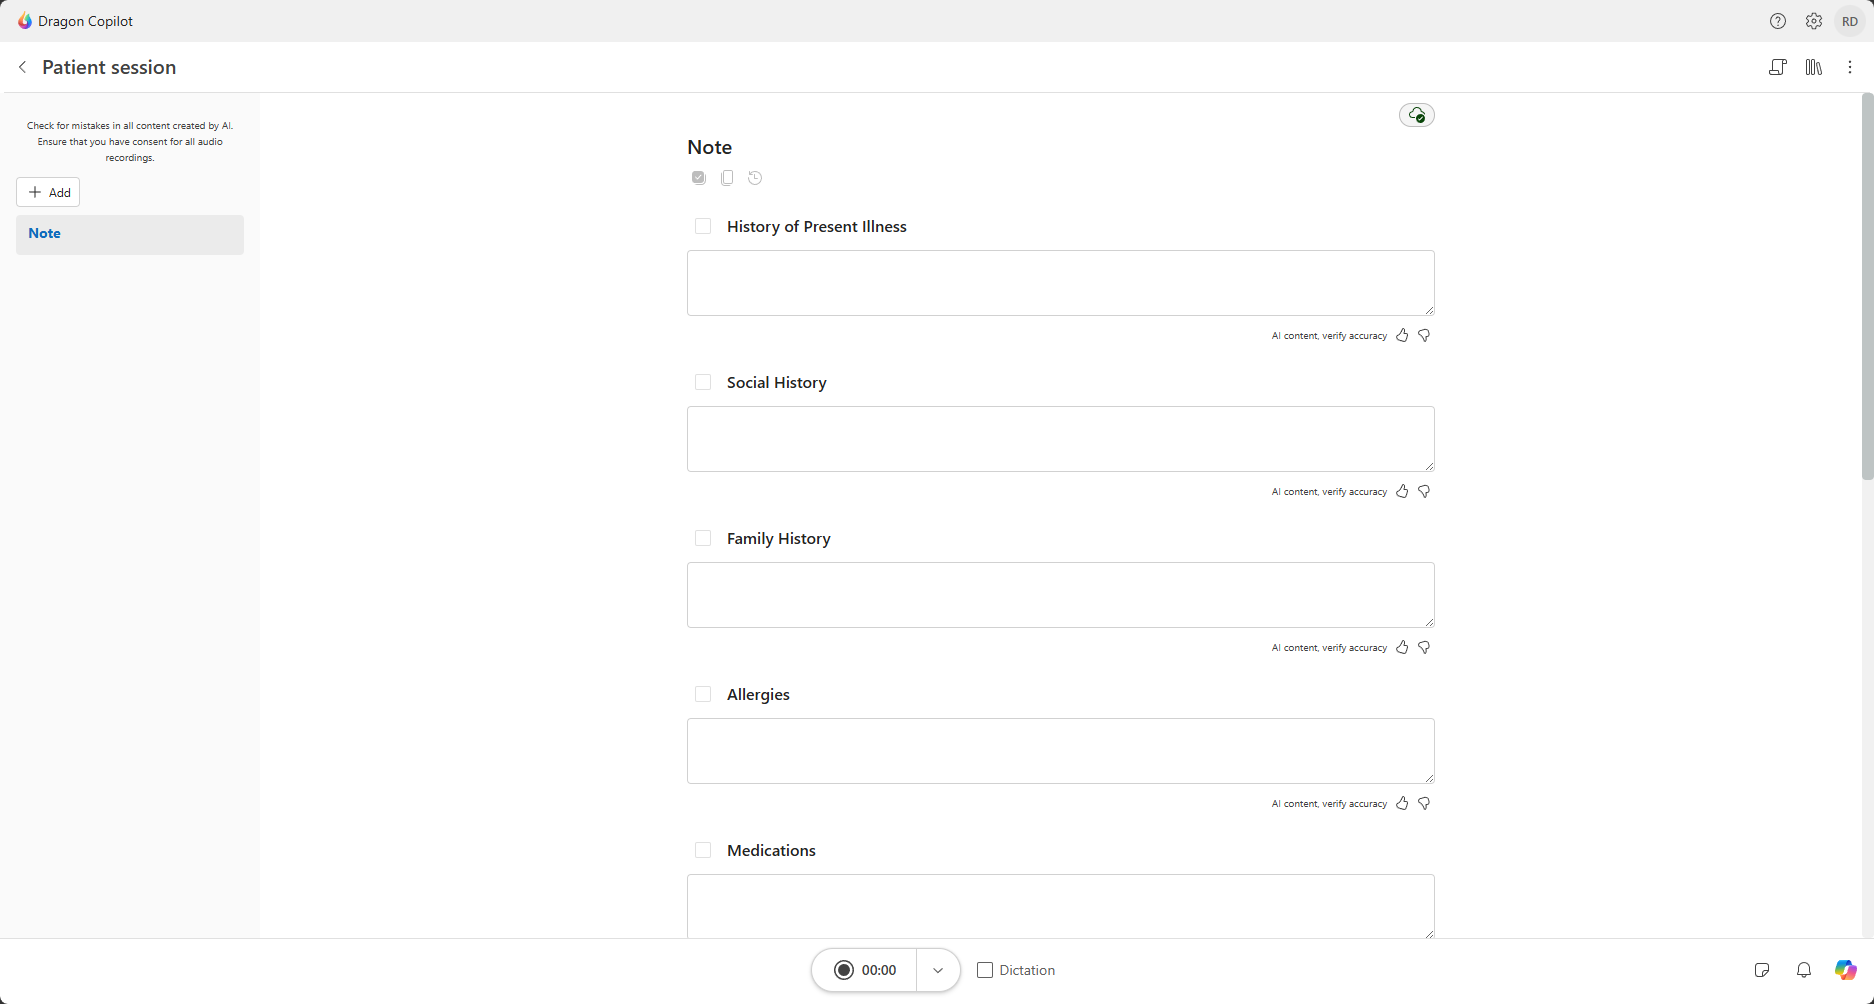
- Patient page: Record encounters, review notes and transcripts, use Copilot Chat, and complete documentation tasks.
Homepage
When you open Dragon Copilot, the homepage helps you find patients, review activity, and access commonly used tools.
Patient page
Select a patient to open a patient session or select Create patient session to start a new one.
The patient page is where you record encounters, review documentation, and work with patient-specific information.
Common icons
Depending on your environment and permissions, you might see the following icons:
 Help: Access resources, training materials, support information, and feedback options.
 Settings: Configure Dragon Copilot preferences and settings.
 Notifications: View important updates and alerts.
 Memos: View and manage notes that aren't part of the patient’s clinical note. Learn more about memos.
 Transcript: Show or hide the transcript of your visit conversation.
 Library: Access prompts and templates. To access all saved texts, prompts, vocabulary, templates, and workflows, use Settings > Library. Learn more about the library.
 Copilot Chat: Ask questions, generate content, and work with patient information by using natural language prompts. Learn more about Copilot Chat.

Use these icons to understand patient and session status in Dragon Copilot:
 Patient match: The patient in Dragon Copilot matches the patient open in Epic.
 Patient match not verified: Dragon Copilot can't fully verify that the patient matches the patient open in Epic.
 Patient mismatch: The patient in Dragon Copilot doesn't match the patient open in Epic.
In Dragon Copilot, select a patient match icon to view more information and available actions.
Tip
Some icons and options might vary based on your device, deployment configuration, administrator settings, and available features.
Follow your patient in Epic
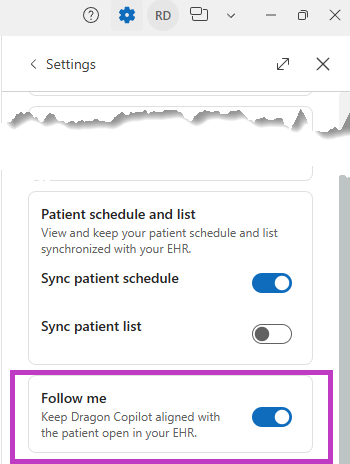
Turn on Follow me to keep Dragon Copilot aligned with the patient you have open in Epic. When you open a different patient in Epic and Dragon Copilot finds a full match, Dragon Copilot automatically opens the matching patient session.
To turn on Follow me:
- Go to Settings
> General.
- Under Follow me, turn on the toggle.
Note
Follow me is off by default and is available only if your organization enables the feature.
Dragon Copilot microphone
Dragon Copilot uses a single microphone button for both dictation and ambient recording. The microphone button enables you to switch your microphone as needed and quickly access other microphone settings.
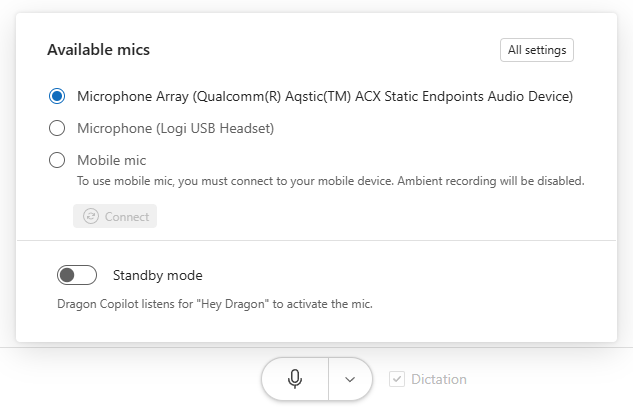
Dictation vs. ambient recording
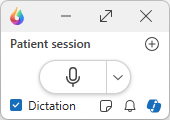
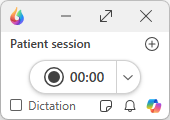
Easily configure the microphone to capture dictation or speech by switching its mode. On the microphone bar, there's a Dictation option which, when selected, enables dictation mode. On mobile, you can find this dictation option in the mic settings next to the mic button.
Dictation: Dictation mode is selected. The microphone is now configured to capture dictation.
Ambient: Dictation mode is unselected. The microphone is now configured to capture your conversation.
Tip
The app remembers the microphone mode when you switch between existing sessions on your worklist.
When you create a new session, the microphone mode defaults to ambient for the session.
Set your specialty for better notes
When you select a specialty, the generated notes are optimized for your clinical specialty by default.
To update your specialty, go to Settings
> Profile.
Select the specialty that best matches your clinical practice.
To learn about the AI output for different clinical specialties and how to verify your primary specialty setting, see AI specialty enhancements.
Ready to do more with Dragon?
Follow these links to learn more and do more with Dragon Copilot (physicians).
What's new in Dragon Copilot (physicians). See what's new in the latest Dragon Copilot release.
Dictate with Dragon. Learn how to dictate with Dragon, use commands, manage vocabulary, and edit and finalize your notes.
Core Dragon Copilot (physicians) workflow. Learn how to create ambient recordings, use Copilot Chat, create documents, and find what you need without leaving the app.
Improve your note output. Change settings, work with note section templates, and use advanced prompting to hone your AI-generated output.
Dragon Copilot (physicians) learning library. Explore training articles to get information and learn how to use all the features and functions of Dragon Copilot.
What can I say? Find voice commands you can use as you dictate with Dragon Copilot.